Lite3D Release 2024.2
Document last updated 2024-05-29
View this document as PDF
About 3D HTML
3D HTML is an HTML document with an embedded 3D viewer application. You can view such documents in any modern browser with support for WebGL. No client-side installation or browser plugin is required.
You can publish your own JT models as 3D HTML documents using LiteBox3D Pro or the Lite3D HTML batch converter.
User interface reference
A 3D HTML document may include the following menus, toolbars and buttons, and additional elements, depending on the template used to create the document.
Navigation bar
|
Fit in item |
Fit the selected item into the scene. |
|
Fit all in |
Fit all items into the scene. |
|
Shading mode |
Choose between a shaded visualization with or without edges. |
|
Show or hide PMI |
Show or hide PMI elements. |
|
Measurements |
Select the measurement tool to take measurements. See Measurements. |
Menu
|
Menu |
If the navigation bar is too narrow to show all controls, some of them are moved to the menu. |
| Menu > Help | Display the 3D HTML user guide (this document). |
| Menu > About | Display the software version and the list of Open Source software used in the LiteBox3D Webviewer. |
| Menu > Error history | The error history contains client error messages for the current session. |
Tree

| To | Do this: |
|---|---|
| Show or hide the tree | Click Tree on the bottom toolbar. |
| Find tree items by name | Type into the text box and press ENTER. Click the arrows to find the previous or next match. |
Tree items
| | Scene |
| | Model file |
| | Assembly |
| | Part |
Controls
| | Hide or show this item |
| | Expand or collapse this node |
| | Isolate the selected item |
Viewing area
You can manipulate the viewing area with the following actions:
| Mouse | Touch screen | |
|---|---|---|
Select |
Left-click |
Tap |
Show the context menu |
Right-click |
Press and hold, then release |
Move |
Press right button, and drag |
Press and hold, then drag |
Rotate |
Press left button, and drag |
Drag |
Zoom |
Scroll the mouse wheel |
Pinch (move two fingers apart or toward each other) |
Context menu
The context menu contains commands to isolate or hide the current selection, or show all elements.
Properties
Click the Properties button to show or hide a list of properties of the selected item.
Click the eye icon in the list header to hide or show hidden properties.

Tools menu

Tools > Screenshot |
Take a screenshot of the current viewing area. The screenshot opens in a new browser tab or window. To save the screenshot as PNG image, right click the screenshot and choose Save image from the context menu. |
|---|---|
Tools > Modelviews |
Choose a modelview from the list. |
Tools > Layerfilter |
Choose a Layer Filter from the list. |
Tools > Clipping |
Cut through the model with clipping planes. See also: Clipping |
Tools > Explosion |
Ahow an exploded view of parts and assemblies. See also: Explode |
Tools > Measure |
See also: Measurements |
| Tools > Options | Change viewer settings:
Animation settings:
|
Measurements
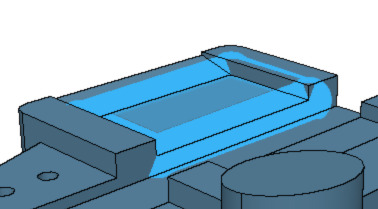
With the measurement tool, you can measure straight distances, angles, point coordinates, and areas.
You can create and edit measurements while measurement mode is enabled. To enable measurements, click the Measurements button on the navigation bar:

Measurement settings
In Tools > Measure, you can change these settings:
Hide measurements: Show or hide all measurements.
Global units: Choose the measurement units.
Font size: Change the font size of measurement labels.
Take measurements with a mouse
If you are using the Webviewer client on a computer with a mouse or similar pointing device, follow these instructions for taking measurements.
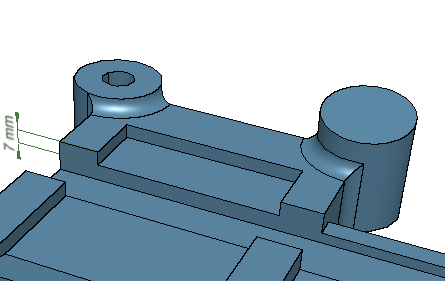
Measure a single item
Click an item of the 3D geometry.

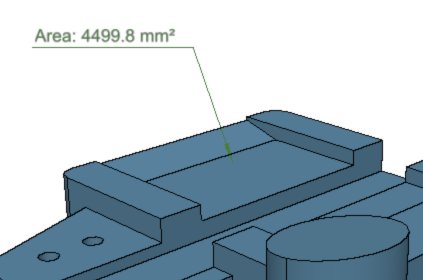
Position 
Area 
Length  and diameter (D) buttons")
Radius (R) or diameter (D) To discard the selection, click the Abort button.

Click to place the measurement label.
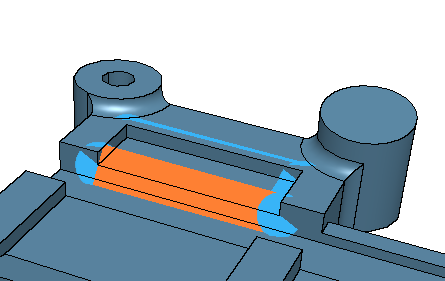
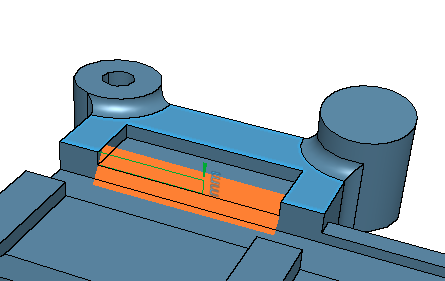
Measure two items
Select a face or edge.
Ignoring the flyout toolbar, select another face or edge.
On the flyout toolbar, choose the dimension you want to measure:

Distance (double arrow symbol) or angle ('<', for intersecting edges) To discard the selection, click the Abort button.
Click to place the measurement label.
Delete a measurement
Select the measurement, then press the DELETE key.
Align measurement to view plane
Double-click the measurement.
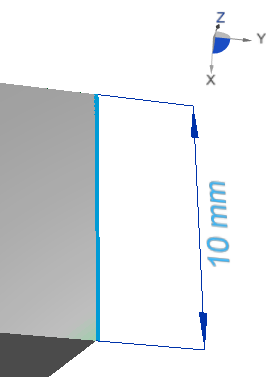
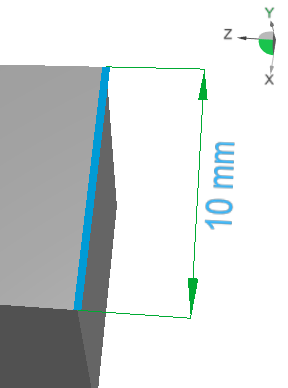
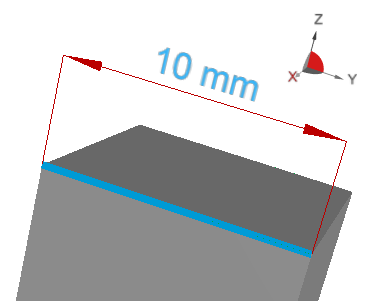
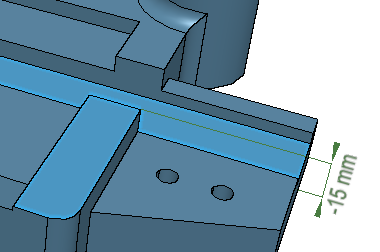
Snap distance measurement label to principal planes
When you move a distance measurement label towards a principal plane, the label snaps to the principal plane. Colors indicate the principal plane to which the label is aligned:
 |
 |
 |
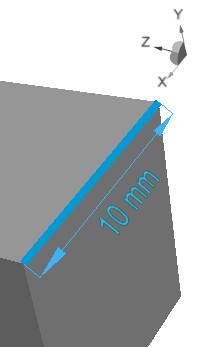 |
Dark blue XY plane |
Green XZ plane |
Red YZ plane |
Light blue Not aligned |
Take measurements on a touch device
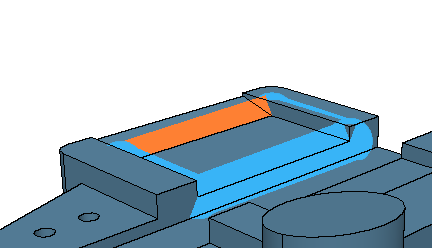
Face area
Tap a face of the 3D geometry.
Tap the Area button

Tap a position in the viewing area where you want to place the label.
Position or edge length
Tap a face of the 3D geometry.

Tap an edge or point of the highlighted face.
Tap a position in the viewing area where you want to place the label.
Tap Length
 or Position
Tap a position in the viewing area where you want to place the label.
Edge length:

Position:

Dimensions between two items
The following instructions show how to measure the distance between a face and an edge. Other dimensions between two items can be measured in a similar way.
Choose the first item. For example, tap a face of the 3D geometry.
Choose the second item. For example, tap a face of the 3D geometry.
Tap a position in the viewing area where you want to place the label.
Change the position of a measurement label
Tap the measurement label.
Tap a position in the viewing area where you want to place the label.
Delete a measurement
Tap the measurement, then tap Delete 

Clipping
Use Tools > Clipping to cut through the model.

- Select the X, Y, and Z buttons to enable clipping planes which are perpendicular to the X, Y, or Z axis, respectively.
- Drag the slider to move an enabled clipping plane along the axis.
- Click the cube icon on the right to cut away the opposite side of the model.
Select or deselect the Wireframe Clipping option to hide or show the wireframe of the cut away geometry. The wireframe is only displayed in Shaded + Wireframe visualization mode
Explosion
Use Tools > Explosion to show an exploded view of parts and assemblies.
The Explosion command is hidden by default. To show it, set service.liteweb.ui.toolsEntries.explosion to true.

Move the slider towards the right for an exploded view.
The top level assembly is exploded first, then the successively the lower assemblies. The current assembly level L0, L1, L2, ... is displayed above the slider
To leave the exploded view, move the slider fully to the left.
Limitations:
-
Clipping and measurements are unavailable in exploded views.
-
Wireframe geometry is hidden in exploded views.
View redlining
The 3D HTML document may include redlining (annotations) created with LiteBox3D Pro.
| | Use the controls to switch between redlining scenes. |
View 3D HTML on mobile devices
You can view 3D HTML documents on mobile devices.
Android
Online
You can view 3D HTML documents in a web browser over HTTP/HTTPS.
Offline
Before going offline, download 3D HTML documents to your device. Open the downloaded 3D HTML document from the file manager, or enter the URI of the local file in the location bar.
See also (external link): Google Chrome - Download a file
iOS
Online
You can view 3D HTML documents in a web browser over HTTP/HTTPS.
Offline
Before going offline, download 3D HTML documents to your device:
-
In the Safari browser, open the 3D HTML document and save it for offline viewing in the Reading List. Make sure that the Settings > Safari > Automatically Save Offline option is selected. See also Add webpages to a Reading List (external link).
-
Use apps for downloading and viewing HTML documents, for example file manager apps with a built-in browser.
Legal notices
Copyright TECHNIA 2024
LiteBox3D Webviewer includes open source software components. For a full list and the terms and conditions, see Open Source Software included in Lite3D Portfolio - list and licenses