This documentation is also available as a webpage in Menu >
Help.
Introduction
About LiteBox3D Webviewer
LiteBox3D Webviewer is based on HTML5 and can be used in any
modern browser on any platform. No client-side installation
or browser plugins are required.
File format compatibility
JT
Lite3D products use an implementation based on the ISO
specification of the JT format (ISO/PAS 14306:2011 and
ISO/IS 14306).
To display 3D geometry, the model must contain a shape LOD
segment with tessellated data.
LiteBox3D Webviewer supports JT file format versions 9.5 to
10.6. It attempts to read unsupported older and newer
versions of the JT file format, but some content may not be
correctly processed and displayed. Users will be notified
accordingly when opening such files.
PLMXML
LiteBox3D Webviewer can read assemblies in the PLMXML format
(.plmxml) with
references to JT files.
STEP AP 242 BO Model XML
LiteBox3D Webviewer can read assemblies in the STEP AP 242
BO Model XML format (.stpx) with references to STEP or JT files.
Lite3D Redlining
LiteBox3D Webviewer can display scenes and annotations
created with LiteBox3D Pro. The typical file extension is
l3dxml.
STEP (ISO 10303-21)
LiteBox3D Webviewer can read STEP files with clear-text
encoding (ISO 10303-21), which can be uncompressed (.stp) or zip-compressed (.stpZ).
Geometry from the following variants of STEP files can be
displayed:
STEP files that contain tessellated data and use an
AP242 edition 1/2/3 schema.
STEP files that contain only BREP data and use one of
the following schemas: AP 203 edition 2, AP 203 + ext,
AP 214 edition 3, AP 242 edition 1/2/3.
Since tessellated data is required for visualization,
the server automatically converts BREP data into
tessellated data when the file is loaded.
Support for STEP BREP is currently a public beta feature
with limitations in terms of geometry display and
performance. We are working on enhancements, which will be
made available in forthcoming releases.
OBJ
LiteBox3D Webviewer can display 3D geometry stored as
triangulated faces in Wavefront Object format (.obj). Supported features include:
Display triangulated faces (but no lines and polygons)
Display material (.mtl) with textures in JPEG and PNG format
VRML
LiteBox3D Webviewer can display files in VRML 2.0 format
(.wrl). Supported
features include:
Display geometry stored as Shape,
IndexedFaceSet, or IndexedLineSet
Display material color
Measurements
Clipping
Viewpoints as model views
Browser client
Client user interface reference
Some elements of the user interface may be hidden, depending
on the configuration.
Navigation bar
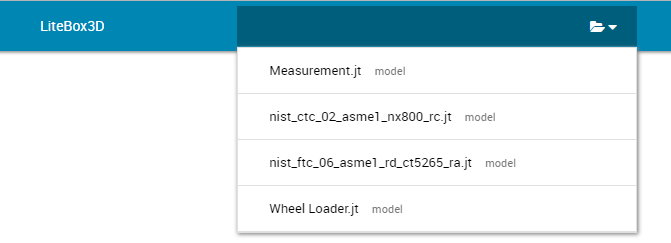
File chooser
Choose a model from the dropdown list, or enter the
location of a model. The location can be a file path,
file URI, http, https, or ftp location and must be
accessible to the Webviewer server.
To add another model to the viewing area, click the
Open button and
choose Add from the
button menu before you choose the model.
The dropdown list contains models from one or more
locations. The locations can be configured on the
server side (see
MODEL_DIRS).
The file chooser is shown if the width of the viewer
is at least 1280 pixels. If the file chooser is not
visible, use the Open button instead.
Open
Click to open the LiteBox3D Explorer dialog,
where you can open or add models to the viewer.
The dialog shows models from one or more locations.
The locations can be configured on the server side
(see MODEL_DIRS).
Use the search field to filter the list by name or
enter the location of a model. The location must be
accessible to the Webviewer server and can be a file
path, file URI, http, https, or ftp location.
Click Open to open the selected model, or click
Add to add the model to the viewing area.
Fit in item
Fit the selected item into the scene.
Fit all in
Fit all items into the scene.
Shading mode
Choose between a shaded visualization with or without
edges.
Show or hide PMI
Show or hide all PMI.
Measurements
Select the measurement tool to take measurements. See
Measurements.
Menu
Menu
If the navigation bar is too narrow to show all
controls, some of them are moved to the menu.
Menu > Help
Display help (this document) for LiteBox3D Webviewer.
Menu > Error history
The error history contains client error messages for
the current session.
Menu > About
Display the software version and the list of Open
Source software used in the LiteBox3D Webviewer.
Ghost Selection: Display the selected item
in full color and other items semi-transparent.
Bounding Box: Show or hide a bounding box
of the entire model.
Orthographic Projection: Switch between
perspective projection (off) and orthographic
projection (on).
Color settings:
Canvas background color: Click the color
tile to pick a background color for the viewing
area.
PMI color: Click the color tile to pick a
PMI color. Depending on the server configuration,
the PMI color defined by the model may take
precedence. See also:
Use PMI color from file
Part highlighting color: Click the color
tile to pick a highlighting color for selected
parts.
Animation settings:
3D scene transition time: Transition time
in seconds between redlining scenes or model
views, and for camera transitions and moving parts
during redlining scenes playback. Set a value
between 0 (no animation) and 5 seconds.
Redlining: Delay between scenes and part
transitions:
For redlining scenes playback, this is the delay
in seconds between setting the camera view angle
and moving parts. Set a value between 0 (no delay)
and 5 seconds.
Redlining: Delay between scenes: For
redlining scenes playback, this is the delay in
seconds before entering the next scene. Set a
value between 0 (no delay) and 5 seconds.
Measurements
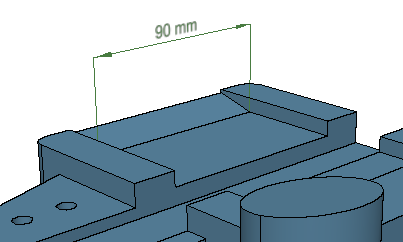
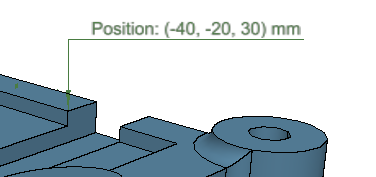
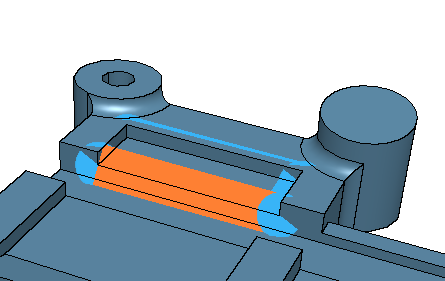
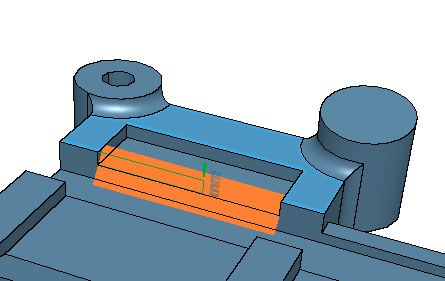
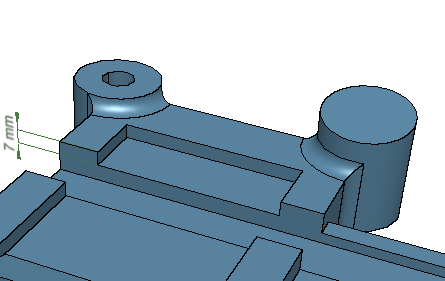
With the measurement tool, you can measure straight distances,
angles, point coordinates, and areas.
You can create and edit measurements while measurement mode is
enabled. Click the Measurements button on the
navigation bar to enable measurement mode:
Server settings
The accuracy of measurements depends on the level of detail
(LOD) and the 3D data compression applied by the LiteBox3D
Webviewer server.
The default settings are LOD 1 (the second highest level of
detail) and 21-bit precision. These settings are a good
tradeoff between overall performance and measurement
accuracy.
If you need best measurement accuracy, use the highest level
of detail (LOD 0). In this case, loading data takes longer
than with default settings.
3D data compression is controlled by the quantization
precision setting. Quantization precision can be increased
up to 30 bit, if appropriate for your application.
In Tools > Measure, you can change these settings:
Hide measurements: Hide all measurements and
disable the measurement tool. Measurements are hidden
until you enable the measurement tool again.
Global units: Choose the measurement units.
Font size: Change the font size of measurement
labels.
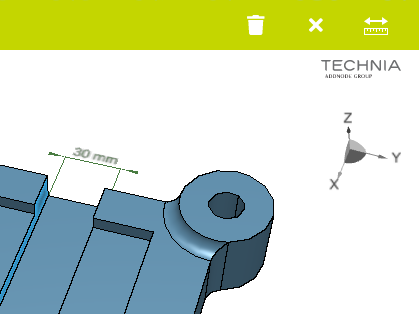
Take measurements with a mouse
When using the LiteBox3D Webviewer client on a computer with
a mouse or similar pointing device, follow these
instructions for taking measurements.
Measure a single item
Click an item of the 3D geometry.
PositionAreaLengthRadius (R) or diameter (D)
To discard the selection, click the Abort button.
Click to place the measurement label.
Measure two items
Select a face or edge.
Ignoring the flyout toolbar, select another face or
edge.
On the flyout toolbar, choose the dimension you want
to measure:
Distance (double arrow symbol) or angle ('<',
for intersecting edges)
To discard the selection, click the Abort button.
Click to place the measurement label.
Delete a measurement
Select the measurement, then press the
DELETE key.
Align measurement to view plane
Double-click the measurement.
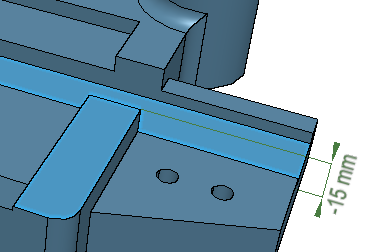
Snap distance measurement label to principal planes
When you move a distance measurement label, it will snap
to a principal plane when getting close. Colors indicate
the principal plane to which the label is aligned:
Dark blue: XY planeGreen: XZ planeGreen: XZ planeLight blue: Not aligned
Take measurements on a touch device
When using the LiteBox3D Webviewer client on a touch device,
follow these instructions for taking measurements.
Face area
Tap a face of the 3D geometry.
Tap the Area button
Tap a position in the viewing area where you want to
place the label.
Position or edge length
Tap a face of the 3D geometry.
Tap an edge or point of the highlighted face.
Tap a position in the viewing area where you want to
place the label.
Tap Length
or Position
Tap a position in the viewing area where you want to
place the label.
Edge length:
Position:
Dimensions between two items
The following instructions show how to measure the
distance between a face and an edge. Other dimensions
between two items can be measured in a similar way.
Choose the first item. For example, tap an edge of the
3D geometry.
Choose the second item. For example, tap a face of the
3D geometry.
Tap a position in the viewing area where you want to
place the label.
Change the position of a measurement label
Tap the measurement label.
Tap a position in the viewing area where you want to
place the label.
Delete a measurement
Tap the measurement, then tap Delete
Clipping
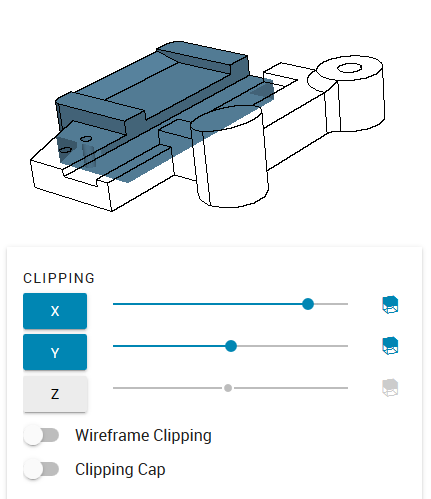
Use Tools > Clipping to cut through the model.
Select the X, Y, and Z buttons to
enable clipping planes which are perpendicular to the X,
Y, or Z axis, respectively.
Drag the slider to move an enabled clipping plane along
the axis.
Click the cube icon on the right to cut away the opposite
side of the model.
Select or deselect the Wireframe Clipping option to
hide or show the wireframe of the cut away geometry. The
wireframe is only displayed in
Shaded + Wireframe visualization mode
Select or deselect the Clipping Cap option to fill
or clear all clipping surfaces.
Click the color tile to pick a color for the clipping cap.
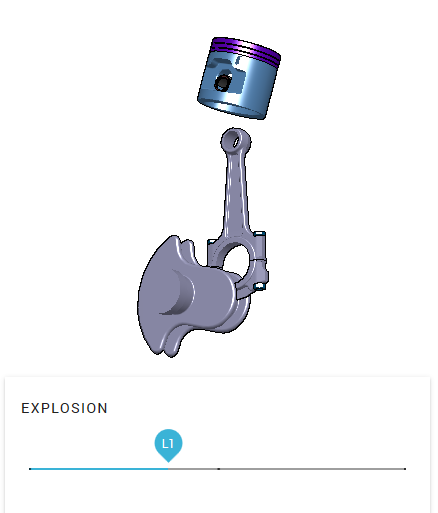
Use Tools > Explosion to show an exploded view of parts
and assemblies.
Move the slider towards the right for an exploded view.
The top-level assembly is exploded first, then
successively the lower assemblies. The current assembly
level L0, L1, L2, ... is displayed above the slider
To leave the exploded view, move the slider fully to the
left.
Limitations
Clipping and measurements are unavailable in exploded
views.
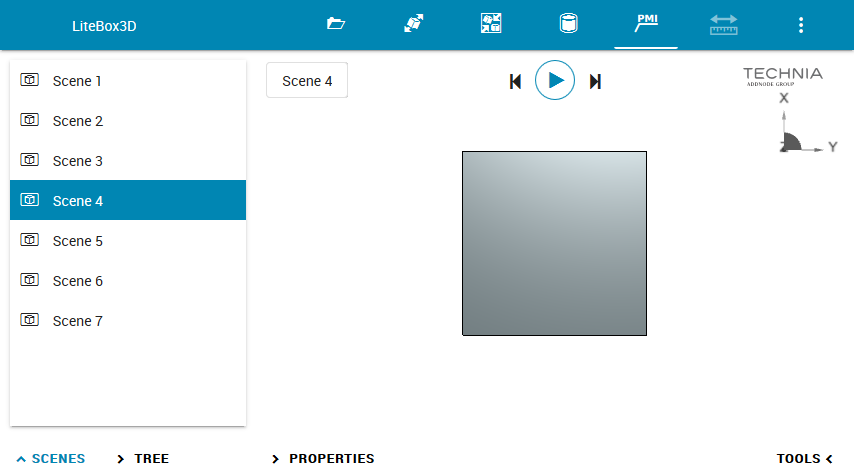
LiteBox3D webviewer can display Lite3D redlining files
(.l3dxml). Lite3D redlining files can be created
with LiteBox3D Pro.
Play or pause an animated sequence of redlining scenes
in a loop.
You can set the duration of transitions and the delay
between steps in
Tools > Options > Animation settings.
Show the previous or next redlining scene.
Show or hide a list of all scenes by clicking
Scenes on the bottom toolbar.
Compatibility between LiteBox3D Desktop and LiteBox3D
Webviewer
Mapping of visualization modes:
LiteBox3D Desktop
Webviewer
Shaded
Shaded
Shaded with edges
Shaded + wireframe
Tessellated
Shaded + wireframe
Textured
Shaded
Edges
Shaded + wireframe
Raytraced is not available with redlining
-
Integration
Open a model by URL request
You can load a model in the Webviewer by adding its location
as a model query string
to the URL. Examples:
https://examplehost:9050?model=file.jt
The file location must be accessible to the server.
Reserved characters in the query string must be encoded as
follows:
Character
Encoded
space
%20
!
%21
#
%23
$
%24
%
%25
&
%26
'
%27
(
%28
)
%29
*
%2A
+
%2B
,
%2C
/
%2F
:
%3A
;
%3B
=
%3D
?
%3F
@
%40
[
%5B
]
%5D
Examples:
Local file C:\path\to\model.jt on the
Webviewer server (Windows):
http://examplehost:9050?model=C:\path\to\model.jt
File hosted on a HTTP, HTTPS, or FTP server:
  # Model location: http://fileserver/public/cube.jt
  http://examplehost:9050?model=http%3A%2F%2Ffileserver%2Fpublic%2Fcube.jt
  # Model location: https://fileserver.example.com/public/cube.jt
  http://examplehost:9050?model=https%3A%2F%2Ffileserver.example.com%2Fpublic%2Fcube.jt
  # Model location: ftp://ftp.example.com/pub/jt/cube.jt
  http://examplehost:9050?model=ftp%3A%2F%2Fftp.example.com%2Fpub%2Fjt%2Fcube.jt
Embedding LiteBox3D Webviewer
To embed the LiteBox3D webviewer into a HTML page, use an
iframe and set its src attribute to the URL of
the webviewer server:
Where
http://examplehost:9050
is the URL of the webviewer server.
Use the Webviewer API to interact with the webviewer.
When using a bundler framework, the Webviewer API can
be embedded using the NPM package
@techniaorg/liteweb-api:
  import { LwApiPM } from "@techniaorg/liteweb-api"
  const LwAPI = new LwApiPM(iframeElement.contentWindow);
Where
iframeElement is the
iframe element which embeds the webviewer.
In static HTML, the Webviewer API can be embedded by
linking to lwapipm.js:
    <script src="http://examplehost:9050/lwapipm.js"></script>
    <-- ... -->
    <script>
      var myframe = document.querySelector('#viewer');
      var win = myframe.contentWindow || myframe;
      var LwAPI = new LwApiPM(win);
    </script>
Where
http://examplehost:9050
is the URL of the webviewer server.
Example: Static HTML page using the embedded LiteBox3D
webviewer and JavaScript API
      <!DOCTYPE html>
      <html lang="en">
        <head>
          <meta charset="UTF-8">
          <title>Webviewer embedded as iframe</title>
          <script src="http://localhost:9050/lwapipm.js"></script>
          <style>
            html, body {
              margin: 0; height: 100%; width: 100%;
            }
            #viewer {
              width: 100%; height: 100%; border: 0; overflow-y: hidden;
            }
          </style>
        </head>
        <body>
          <iframe src="http://localhost:9050/" id="viewer"></iframe>
          <script>
            var myframe = document.querySelector('#viewer');
            var win = myframe.contentWindow || myframe;
            var LwAPI = new LwApiPM(win);
            if (LwAPI) {
              myframe.onload = function() {
                // Do something with the webviewer API
                LwAPI.openModel('Flange.jt')
                .then(LwAPI.setBoundingBoxVisibility(true))
                .catch (function (error) {
                  console.error('LwAPI Error:', error);
                });
              };
            }
          </script>
        </body>
      </html>
JavaScript API
General notes
The JavaScript API is added to the global Window object.
Most API functions of the LiteBox3D webviewer are executed
asynchronously. Instead of returning a value directly, a
Promise is returned.
Some API functions expect an ID of a model item as input.
The ID can be retrieved, for example, by parsing the object
returned by getTree() or by the
selection event handler
registerOnSelection().
If the Webviewer is embedded in an <iframe>, the
returned object has no member functions. This is due to the
standard behavior of an <iframe>, where messages
between an <iframe> and its parent window are
serialized and deserialized.
Live examples
For some JavaScript API commands you can find a live example
on TECHNIA's demo server. Click the "Demo" links to see
these examples, or go to the
list of examples.
For some JavaScript API commands you can find a live example
on TECHNIA's demo server. Click the "Demo" links to see
these examples.
Using Promises
Most API functions of the LiteBox3D webviewer are executed
asynchronously. Instead of returning a value directly, a
Promise is returned.
Example
The following commands are executed one after another:
      // 1. Get model views
      LwAPI.getModelViews()
      // 2. Choose and set a model view
      .then(function(views){
        var idx = getViewIndexByName("Top");
        return LwAPI.setModelView(idx);
      })
      // 3. Show PMI:
      .then(function(){
        return LwAPI.setPmiVisibility(true);
      })
      // 4. Highlight a PMI by its origin:
      .then(function(){
        return LwAPI.highlightByOrigin(45.678, 123.456, 12.345);
      })
      // 5. If any of the Promises fails, print the error object to the console:
      .catch(function(e){
        console.log(e);
      });


      // Helper function: Get view index by name
      function getViewIndexByName(name)
      var viewIndex = null;
      for(var v = 0; v < views.length; v++) {
        if(views[v].name == "Top") {
          viewIndex = views[v].index;
          break;
        }
        return new Promise(function(resolve,reject){
          if (viewIndex == null) {
            reject(new Error("View " + name + " not found"));
          } else {
            resolve(viewIndex);
          }
        })
      }
addComment
Attach a comment to a 3D point. The comment is shown as a
clickable symbol.
point: {x:number, y:number, z:number}Coordinates of the 3D point to which the comment is
attached.
Example 1
Add a new comment at given 3D coordinates
    // Add a comment
    LwAPI.addComment('Comment 2001', {"x":400,"y":300,"z":82});
Example 2
Add a new comment at a 3D point calculated from the
right-click position of the context menu. To perform an
action on clicking the comment symbol, register a
selection handler.
    // To perform an action when clicking the comment symbol, register a selection handler
    LwAPI.registerOnSelection(e => {
      if (e.type == LwSelectionType.COMMENT)
        console.log('comment selected!', e.item);
    });

    // Sequential number to identify each comment
    var cmtNum = 0;

    // Add a new comment at a 3D point calculated from the right-click point of the context menu.
    // If getMousePosition3D() returns null, no comment will be added.
      LwAPI.addContextMenuItem('Add comment', function (pt2) {
      LwAPI.getMousePosition3D(pt2).then(function (pt3) {
        if (pt3 == null) {
          alert("Could not get a 3D point to attach the comment.");
        }
        else {
          LwAPI.addComment(["cmt", ++cmtNum].join(""), pt3);
        }
      });
    });
callbackCallback function triggered by the
context menu item. The argument passed to the callback
function is an object containing the x and y coordinates
of the right-click which has opened the context menu.
Example
Add new items to the context menu of the viewing area
      // Add a context menu item
      LwAPI.addContextMenuItem('Say hello', function() {
        alert("Hello");
      });

      // Add another context menu item and pass the click position to the callback function
      LwAPI.addContextMenuItem('Get click position', function(pos) {
        console.log(pos['x']);
        console.log(pos['y']);
      });
      LwAPI.applyConfig({

        // Visibility of UI elements:
        showNavbar: true,             // Navigation bar
        showBottomToolbar: true,      // Bottom toolbar
        treeExpanded: true,           // Initially show or hide the tree panel
        treeStartLevel: 0,            // Hide the topmost levels of the tree structure (number)
                                      // 0 = Show all tree levels
                                      // 1 = Hide the Scene node
                                      // 2 = Hide the Scene and file nodes
                                      // 3 = Hide the Scene, file, and root assembly nodes.
                                      // etc.
        showProgressbar: true,        // Progress bar
        showToasts: true,             // System messages
        showLogo: true,               // Show or hide the TECHNIA logo in the viewing area
        showCoordinateSystem: true,   // XYZ coordinate system
        disableSelection: true,       // Disable the selection of items
        explorerTileVisu: false,      // In narrow windows, show tiles file chooser

        // Visibility of controls on the bottom toolbar:
        bottomToolbarEntries: {
          tree: true,                 // Tree
          properties: true,           // Properties
          tools: true                 // Tools
        },

        // Visibility of controls on the navigation bar:
        showOpenButton: true,         // File chooser
        navbarEntries: {
          fitAllIn: true,             // Fit all in
          fitInItem: true,            // Fit selected item in
          pmi: true,                  // Show/Hide PMI
          help: true,                 // Help
          errorHistory: true,         // Error history
          about: true,                // About
          shaded: true,               // Shading options
          measurement: true           // Enable/disable measurements mode
        },

        // Visibility of items on the Tools menu:
        toolsEntries: {
          screenshot: true,           // Screenshot
          modelviews: true,           // Modelviews
          clipping: true,             // Clipping
          explosion: true,            // Explosion
          options: true,              // Options
          measurement: true,          // Measurement
          layerfilter: true           // Layerfilter
        },

        // Visibility of items in the Tools > Options dialog:
        optionsEntries: {
          ghostSelection: true,       // Ghost selection
          boundingBox: true,          // Bounding box
          projection: true,           // Orthographic projection
          animation: true             // Animation settings
        },

        // Clipping options
        clippingCap: true,                // Show clipping cap
        clippingCapColor: [197,185,172],  // Clipping cap color (RGB)
        wireframeClipping: true,          // Wireframe clipping

        // In Tools > Modelviews, display model views attached to the root (false)
        // or attached to the current selection (true)
        nonRootModelViews: true,

        lengthUnit: "mm",                           // Length unit for measurements
        screenshotPrefix: "LiteBox3D_Screenshot_",  // File name prefix for screenshots
        showPMI: true,                              // Show or hide PMI
        usePmiColorsFromFile: true,                 // Use PMI colors from file (true)
                                                    // or pmiColor (false)
        pmiColor: [0,0,0],                          // Custom PMI color
        canvasBackgroundColor: [255,255,255],       // Background color of 3D viewing area
        highlightColor: [254,128,51],               // Highlight color for selected items in 3D
        measurementColor: [0,0,0],                  // Measurements color

        rotation: {          // 3D rotation
          enable: false,     // - Enable rotation
          axis: [1,0,0],     // - Rotation axis
          speed: 0           // - Speed: 0 = slow, 1 = medium, 2 = fast
        },

        // Set a default view on load: "ISO", "TOP", "BOTTOM", "LEFT", "RIGHT", "FRONT", "BACK"
        defaultView: "ISO",

        // Transition time [s] between modelviews and between redlining scenes
        sceneTransitionTime: 1,
        // Redlining playback: Delay [s] between setting the camera view angle and moving parts
        delayBetweenCamAndPartMovement: 2,
        // Redlining playback: Delay [s] before entering the next scene
        delayBetweenScenes: 2,

        defaultProjectionOrtho: false,    // Perspective: orthographic (false) or perspective (true)
        shadingMode: 1,                   // Visualization: 0 = Shaded, 1 = Shaded with wireframe
        showBoundingBox: false,           // Show or hide bounding box
        ambientLightIntensity: 1.0,       // Ambient light intensity, default is 1.0
        directionalLightIntensity: 1.0,   // Directional light intensity, default is 1.0

        // Shape LOD to display: 0 = highest detail, 1 = 2nd highest detail, etc.
        lodLevel: 0,

        // Compression and precision of 3D data. Values: 2 .. 30, default is 21
        // 2 = Maximum compression
        // 14 = Generally sufficient precision for display but not for measurements
        // 30 = Lowest compression, maximum precision
        quantizationBits: 21
      });
locationLocation of the model file. The
location can be any of the following:
URL over HTTPS, HTTP, or FTP
File path relative to a base path defined by the
MODEL_DIRS variable.
Absolute file path defined by the
ALLOWED_DIRS variable
configCustom HTTP headers for requesting
model data over HTTP/HTTPS.
The headers object contains one or more name-value
pairs. The webviewer server adds these HTTP headers when
requesting model data from an HTTP/HTTPS server.
Known limitation: Only monolithic model files can be
requested with custom HTTP headers. Custom HTTP headers
are not used when requesting external references of
models (fully shattered JT, PLMXML, STEP AP242 BO Model
XML).
Error handling
The openModel() method returns an object:
{ msg, error }
If the command has succeeded, msg is an empty
string and error is null. If an
error has occurred, msg contains the error
message and error is an error object.
Example
Open a model
LwAPI.openModel("block.jt");
Open a model, with error handling
    LwAPI.openModel("nothing.jt")
    .then(function(result){
      if (result.error !== null) alert(result.msg);
    });
configCustom headers for requesting model
data over HTTP/HTTPS.
The headers object contains one or more name-value
pairs. The webviewer server adds these HTTP headers when
requesting model data from an HTTP/HTTPS server.
If the command has succeeded, msg is an empty
string and error is null. If an
error has occurred, msg contains the error
message and error is an error object.
Example
    // Add the given model
    LwAPI.addModel("file.jt");
    // Add and transform the given model
    var tm = [ 100, 0, 0, 0, 0, 1, 0, 0, 0, 0, 1, 0, 0, 0, 0, 1 ];
    LwAPI.addModel("file_2.jt", tm );
urlLocation of the model file. Give the
full file path on the webviewer server, or a URL.
Full path: c:/path/to/file.jt
URL of the file over HTTP, HTTPS, or FTP:
http://host/dir/file.jt
Result
The closeModel() method returns an object.
{ msg, error }
If the command has succeeded, msg is an empty
string and error is null. If an
error has occurred, msg contains the error
message and error is an error object.
Example
    // Close the given model
    LwAPI.closeModel("block.jt");
The getMousePosition3D() method returns an object containing
the coordinates of the 3D point. If no 3D geometry is
displayed at the given screen coordinates, the result is
null.
Get the 3D coordinates from the right-click where a
context menu has been invoked. getMousePosition3D() is
used as the callback function of a context menu item.
    // Add context menu item
    LwAPI.addContextMenuItem('Get 3D point', function (pt2) {
      // Get mouse position in 3D
      LwAPI.getMousePosition3D(pt2).then(function (pt3) {
          console.log(pt3['x'] + '|' + pt3['y'] + '|' + pt3['z']);
      });
    });
urlLocation of the model file, which can be
a URL or absolute file path. This parameter is optional.
If you leave out this parameter, getTree returns a
Promise with an array of objects, one LwTreeData object
for each model.
If you specify a model with the url parameter,
the returned value is a single LwTreeData object for
that model.
Example 1
Get tree data for a specific open model and print it to
the browser console.
    // Object for storing tree data
    var trees = {};
    // Model file path
    var p = "file.jt";

    // Open the model
    LwAPI.openModel(p);

    // Wait for loading to finish
    LwAPI.registerOnReady(function(){
      LwAPI.getTree(p)
      .then(tree=>{
        // Get tree data
        trees[p] = tree;
      });
    });

    // Print item from tree object
    function TEST_printTreeData() {
      console.log(trees[p].root.bbox.min.x);
    }
Example 2
Get tree data for all open models, then print the root
name of each model to the browser console
idItem ID of the format model:item, for
example "1:42"
LwItemSelectorItem selector. If the
selected item does not match the type selector,
searchTreeItem returns an error message. To accept any
item, use an empty object {} as item
selector.
idItem ID if the format model:item, for
example "1:42".
textTitle of the tree item.
typeItem type: 'model',
'part' or 'assembly'
childrenArray containing the children of
the item.
parentParent of the item.
Example
    var p = "Measurement.jt";
    var itemID = "1:25";
    /* In most cases, you wouldn't define a static item ID
    but retrieve it from tree data or from a selection event */

    LwAPI.registerOnReady(readyHandler);

    function readyHandler(){
      LwAPI.getTree(p)
      .then(function(tree){
        return LwAPI.searchTreeItem(itemID,{})
      })
      .then(function(treeItem){
        console.log(treeItem);
      })
      .catch(function(err){
        console.log(err);
      });
    }
Get the current state of the model tree and store it in an
object:
Visibility of parts and assemblies
Expanded and collapsed tree branches
Item selection, if any
The model tree can be restored later to this state using
setTreeState().
getTreeState(url?:string) : Promise<LwTreeData>
urlCapture the tree state for the model
with the given URL only. Leave out the URL to capture
the tree state for the entire scene.
Example
        // Get the current state of the entire model tree and store it in an object
        var tree1 = await LwAPI.getTreeState();
        // Get the tree state of particular models in the scene and store them in separate objects
        var tree2 = await LwAPI.getTreeState('assy1.jt');
        var tree3 = await LwAPI.getTreeState('part2.jt');
Set the model tree to a defined state which has been
captured before using getTreeState().
Visibility of parts and assemblies
Expanded and collapsed tree branches
Item selection
If the selection was empty when the tree state was stored,
the current item selection is retained on
setTreeState().
setTreeState(tree:LwTreeData) : Promise<void>
treeCaptured model tree state.
Example
        // Get the current state of the entire model tree and store it in an object
        var tree1 = await LwAPI.getTreeState();
        // Apply the capture model tree state
        LwAPI.setTreeState(tree1);
Toggle the selection of the given item, or deselect all
items.
If the item given by the ID is already selected,
setNodeSelection(id, true) will deselect the item.
To get a defined selection, deselect all items with before
you select an item (example 1). Alternatively, you can read out the selection state from
tree data (example 2).
idItem ID in the form model:item, for
example "1:42".
stateTo toggle the selection of the given
item, set true. To deselect all, set false.
Example 1
Deselect all items, then select an item with a given ID.
    var id = "1:1134"

    // Deselect all items
    LwAPI.setNodeSelection("", true)
    .then(function(){
      // Select an item by ID
      return LwAPI.setNodeSelection(id, true);
    });
Example 2
Get the selection state of an item from tree data, then
select the item if necessary.
    LwAPI.getTree("./test.jt")
    .then(function(tree){
      var myItem = tree.root.children[42];
      if (myItem.state.selected==false) LwAPI.setNodeSelection(myItem.id,true);
    });
showShow (true) or hide
(false) the comments on the list.
listList of identifiers of the comments to
show or hide. An empty list [] stands for
all comments.
resetIf this parameter is
false or not given, apply the given
visibility to the comments on the list, and leave all
others unchanged.
If this parameter is true, apply the given
visibility to the comments on the list, and the opposite
visibility to all other comments.
Examples
Show the comments with identifiers "cmt1" and "cmt2", leave
all others unchanged:
LwAPI.showHideComments(true, ["cmt1", "cmt2"]);
Hide the comments with identifiers "cmt1" and "cmt2", leave
all others unchanged:
LwAPI.showHideComments(false, ["cmt1", "cmt2"]);
Show comments with identifiers "cmt1" and "cmt2", hide all
others:
idLeave out the ID to get the model views
attached to the root assembly.
Set an ID to get the model views attached to the
corresponding item, for example "1:25". Non-root model
views are only available if
UI_NONROOTMODELVIEWS or
nonRootModelViews is true.
Result
The result of getModelViews() is an array of LwModelViewData
objects.
    LwModelViewData: {
      index,
      name,
      id,
      assemblyId
    }
indexIndex number of the model view (0, 1,
2, 3, ...)
nameModel view name
idModel view ID
assemblyIdItem ID of the assembly to which
the model view is attached
Example
Get the root model views.
    LwAPI.getModelViews()
    .then(function(viewlist){
      // Display message with all model view names
      var names = "List of model view names attached to root:\n";
      viewlist.forEach(function(view){
        names = names + view.name + ", ";
      });
      alert(names);
    });
Get the model views attached to the assembly with ID
'1:3864'.
    // Before you open the model, enable non-root model views:
    LwAPI.applyConfig( { nonRootModelViews: true } );

    // Open a model
    LwAPI.openModel('c:/path/model.jt');

    LwAPI.registerOnReady(function(){
      var itemId = "1:3864";
      LwAPI.getModelViews(itemId)
      .then(function(viewlist){
        // Display message with all model view names
        var names = "List of model view names attached to root:\n";
        viewlist.forEach(function(view){
          names = names + view.name + ", ";
        });
      });
    });
indexIndex number of the model view as
returned by getModelViews.
idID of the item to which the model views
are attached. If UI_NONROOTMODELVIEWS or
nonRootModelViews is false,
you can omit the ID.
The result value is always true.
The animated transition between model views is completed
within the defined view transition time. We recommend
waiting for the transition to finish before sending further
API commands which may change the view. Otherwise, changes
by subsequent commands may be superseded by setModelView.
Examples
Get all model views. Look for a model view with name "Top",
and set this model view.
Set a model view, then wait 2 seconds for the animation to
finish before starting the next command
    // Set the transition time in seconds
    var trTime = 2;
    LwAPI.applyConfig({ sceneTransitionTime: trTime });

    // Set the model view, wait, then reframe on the given item
    LwAPI.setModelView(1)
    .then(function(){
      return delay(trTime * 1000);
    })
    .then(function(){
      return LwAPI.reframe("1:517");
    });

    function delay(t) {
      return new Promise(function(resolve) {
          setTimeout(resolve, t)
      });
    }
Choose a PNG image from disk and use it as the comment
symbol.
    <input id="chooser" type="file" onchange="ReadFile();" />

    <script>
    // Read a PNG image file from disk
    function ReadFile() {
      var filelist = document.getElementById("chooser").files;
      if (filelist.length > 0) {
        var reader = new FileReader();
        reader.onload = async function(e) {
          var data = e.target.result;
          var dims = await GetImageDims(data);

          // Set the image file as comment symbol
          LwAPI.setCommentImage(data,dims.width);
        }
        reader.readAsDataURL(filelist[0]);
      }
    }

    // Get width and height of the image
    function GetImageDims(data) {
      return new Promise(function (resolve, reject) {
        var img = new Image();
        img.onload = function() {
          return resolve({ width: img.width, height: img.height });
        };
        img.onerror = function(error) {
          return reject(error);
        };
        img.src = data;
      });
    }
    </script>
     ScreenshotOptions: {
       promptSaveDialog?: boolean,
       type?: string,
       encoderOptions?: number
     }
promptSaveDialogReturn image data as
base64-encoded string (false, default)
prompt the user to save the screenshot to a file
(true). This parameter is optional.
typeImage file format:
"image/png"PNG (default) with transparent
background
"image/jpeg"JPEG with solid black
background
This parameter is optional.
encoderOptionsQuality and compression of
JPEG images.
Set a number between 0.0 (smallest file size) and 1.0
(largest file size, highest JPEG quality).
This parameter is optional and applies only to the JPEG
file type. The default value is 0.95.
Examples
Take a screenshot and display it in a new browser window.
LwAPI.screenshot();
Take a screenshot in the default format (PNG) and prompt
the user to save the image.
LwAPI.screenshot( { promptSaveDialog: true } );
Take a screenshot in JPEG format with default JPEG
quality, and prompt the user to save the image.
     LwAPI.screenshot( { promptSaveDialog: true, format: "image/jpeg" } )
     .then(function(result){
       // do something with the result, for example
       document.getElementById("preview").src = result;
     });
Set a custom file prefix for screenshots, take a
screenshot, and prompt the user to save the image.
Take a screenshot in JPEG format with user-defined JPEG
quality.
     var options = { format: "image/jpeg", encoderOptions: 0.4 };
     LwAPI.screenshot(options)
     .then(function(result){
       // Do something with the result, for example display the image in a placeholder:
       document.getElementById("preview").src = result;
     });
Take a screenshot and open it in a new window.
      var options = { format: "image/png" };
      LwAPI.screenshot(options)
      .then(function(result){
        var img = new Image();
        img.src = result;
        var wnd = window.open("");
        wnd.document.write(img.outerHTML);
      });
Register an event handler for the event when model data has
been loaded completely.
The event occurs as
openModel or
openImageFromBase64
becomes resolved. The event also occurs immediately when
registering the event handler if a model is already open.
On this event, all data has been loaded but visualization
might not be complete. The client still takes some time to
visualize the model. The time can vary depending on model
size, client hardware, and browser.
Register and unregister a callback function for error
events.
      // Identifier of the registered error callback function
      var errHndId = null;

      // Register the callback function
      function registerErr() {
        LwAPI.registerOnError(errCallback)
        .then(function(id){
          errHndId = id;
        });
      }

      // Unregister the callback function
      function unregisterErr() {
        LwAPI.unregisterOnError(errHndId);
      }

      // Callback function
      function errCallback(err) {
        alert("Error code " + err.number + "\n" + err.text);
      }
Register a callback function for a selection event in the
tree or scene. The returned number is the ID of the listener
which is required to unregister the callback.
sourceSource of the selection event: 0 =
user action in the viewing area, 1 = user action in the
model tree, 2 = API
itemSelected item
modelId, modelItemIdModel and item ID
type(internal)
partItemsArray of items belonging to the
selected assembly. Only available if the source of the
selection event is the model tree or API.
faceGroupIdFace group ID of the selection;
-1 if unavailable
selected(internal)
positionWhen you click in the viewing area,
this returns the coordinates [top,left] of
the click point relative to the upper left corner of the
browser window.
Example
When selecting an item, print the item ID and click position
to the browser console.
Register a callback function for the event of an item
changing its visibility. The returned number is the id of
the listener which is required to unregister the callback.
This function gets the current camera view. The camera view
can stored in a variable and applied again later with
setCamera.
getCamera() : Promise<LwCameraSnapshot>
Example
       // Declare a variable for the camera view
       var camstore;

       // Get the camera view
       LwAPI.getCamera()
       .then(function(cap){
         camstore = cap;
         // Set a different view
         return LwAPI.setView(1);
       })
       .then(function(){
         // Wait 2 seconds
         return new Promise(function(resolve) {
           setTimeout(resolve, 2000)
         });
       })
       .then(function(){
         // Restore the camera view
         LwAPI.setCamera(camstore);
       });
cameraLwCameraSnapshot object created using
getCaptureWithPoints
Example
       // Declare a variable for the capture
       var capture;

       // Get the capture
       LwAPI.getCaptureWithPoints()
       .then(function(cap){
         capture = cap;
         // Set a different view
         return LwAPI.setView(1);
       })
       .then(function(){
         // Wait 2 seconds
         return new Promise(function(resolve) {
           setTimeout(resolve, 2000)
         });
       })
       .then(function(){
         // Restore the captured view
         LwAPI.setCamera(capture.camera);
       });
Example
        // Declare a variable for the camera view
        var camstore;

        // Get the camera view
        LwAPI.getCamera()
        .then(function(cap){
          camstore = cap;
          // Set a different view
          return LwAPI.setView(1);
        })
        .then(function(){
          // Wait 2 seconds
          return new Promise(function(resolve) {
            setTimeout(resolve, 2000)
          });
        })
        .then(function(){
          // Restore the camera view
          LwAPI.setCamera(camstore);
        });
positionsArray of coordinates of the points
to add.
r, g, bColor of the points to add. Specify
the RGB color code as a list of three numbers 0.0 to
1.0.
radiusPoint radius [mm].
idsArray of IDs. Every point must have an
ID. The ID must not contain a colon :
urlURL of the model to which the points are
applied. This parameter is optional. If you omit this
parameter, the points are applied to the model added
last to the viewing area.
A point can be selected interactively in the viewing area or
by its ID using setNodeSelection. Registered
selection event listeners also apply when selecting points.
This function returns an object defining the current camera
position. In addition, the object provides a screenshot as
base64-encoded string, and an array of points that were
added with LwAPI.addPoints.
     LwCaptureDetails {
      image: string,
      camera: LwCameraSnapshot,
      points: [
        {
          id: string,
          pos: THREE.Vector2 {
            x : number,
            y : number
          }
        }
      ]
     }
imageScreenshot image in PNG format as
base64-encoded string.
LwCameraSnapshotObject defining the camera
position. To restore the camera position, supply this
object as parameter to setCamera.
points[]Array of all points added to the
scene using addPoints().
idID of the point
xX coordinate of the point
yY coordinate of the point
Example
      // Add some points
      LwAPI.addPoints([10, 10, 10, 10, 0, -1, 10, 34.1, -15.7], 0, 255, 255, 1, ["p1", "p2", "p3"]);

      // Show an alert with the IDs of the points
      function showPointIDs(){
        LwAPI.getCaptureWithPoints()
        .then(function(capture){
          var str = "Point IDs are ";
          capture.points.forEach(function(p){
            str = str + p.id + " ";
          });
          window.alert(str);
        });
      }

      // Display the screenshot in an image element with ID "thumbnail"
      function displayScreenshotFromCapture(){
        LwAPI.getCaptureWithPoints()
        .then(function(capture){
          if capture.hasOwnProperty("image"){
            document.getElementById("thumbnail").setAttribute("src", capture.image);
          }
        });
      }

      // Set the camera to top view and rever to the view defined in the capture.
      function viewTopAndReturn(){
        LwAPI.getCaptureWithPoints()
        .then(function(capture){
          LwAPI.setView(1);
          return capture;
        })
        .then(function(capture){
          delay(2000)
          return capture;
        })
        .then(function(capture){
          LwAPI.setCamera(capture.camera);
        });
      }


      .then(function(capture){

        // Display the screenshot in a new window
        window.open(capture.image);
        // Set the camera to top view ...
        LwAPI.setView(1);
        return capture;
      })
      .then(function(capture){
        // ... and revert to the defined camera view
        LwAPI.setCamera(capture.camera);
      });
          var sceneChangeListenerId = null;

          LwAPI.registerOnSceneChange(function(){
            var now = new Date(Date.now()).toISOString();
            console.log(now +  " : Camera view has changed")
          })
          .then(function(listenerId){
            // Keep note of the ID if you want to unregister the event listener
            sceneChangeListenerId = listenerId;
          });
Highlighting is intended for TIFF images with 1-bit color
depth (black and white) and CCITT Group 4 compression.
Highlighting is not supported for other sub-formats.
The license is valid for a certain maximum number of server
instances at the same time.
The license must be installed on a FlexNet license server
accessible to the LiteBox3D webviewer server. You can get the
required license server software and installation instructions
on the
TECHNIA website. Below the heading Software Download, choose
FlexNet Publisher as product and the platform on which
to install the license server.
Install with minimal configuration
To get a first impression of LiteBox3D Webviewer with your own
data and an evaluation license, you can set up a server with
minimum configuration:
Extract the LiteBox3D Webviewer installation zip archive
to an installation directory of your choice.
Open the file liteweb\.env in a text
editor.
In the .env file, define the following
environment variables:
MODEL_DIRS, which defines directories
whose contents will be shown in the file chooser
TRANSCAT_LICENSE_FILE, which defines the
directory containing the license file or the license
server location.
Example:
        :: Directories containing model files. Multiple entries are separated by comma.
        MODEL_DIRS=C:/liteweb/model,C:/examples
        :: Directory containing licenses ...
        TRANSCAT_LICENSE_FILE=C:/licenses
        :: or the License server
        TRANSCAT_LICENSE_FILE=27000@licserv
Save and close the .env file.
Run start.bat in the application directory.
This will open a command window and start the server.
The command window must remain open to keep the server
running.
Open a browser window and go to
http://localhost:9050.
The browser should now display the LiteBox3D Webviewer.
Click Open and choose one of the models.
Further steps:
Server configuration.
Changes to the configuration become active after
restarting the LiteBox3D Webviewer server.
Shut down
To stop the server of the local test installation, activate
the command window, then press Ctrl+c.
Minimal installation on Docker
Preparations
Please contact TECHNIA to
get a Docker image file for LiteBox3D Webviewer and an
evaluation license.
Before you run the command, adjust the arguments as needed:
--name "liteweb3xx" assigns a name to the new
container.
c:\liteweb\license is the path to the license
directory on the Docker host.
c:\models is the directory path to model
files on the Docker host.
-e PORT=9050 defines the web server port
inside the Docker container.
-p 81:9050 maps port 81 on the Docker host to
port 9050 inside the container. Port 81 is
the port on which browser clients can connect to the
server.
Additional settings can be defined using environment
variables. For example, to hide PMI annotations by
default, you can add: -e UI_SHOWPMI=false
Then run the adjusted command.
Start the webviewer server
At the command prompt, run this command to start the
container:
docker start liteweb3xx
Where liteweb3xx is the name assigned to the
container.
Open a browser client
At the command prompt, run this command to start the
container:
docker start liteweb3xx
Where liteweb3xx is the name assigned to the
container.
Stop the webviewer server
At the command prompt, run this command to start the
container:
docker stop liteweb3xx
Where liteweb3xx is the name assigned to the
container.
Other useful commands
In the following commands, liteweb3xx stands
for the name assigned to the Docker container.
Command
Description
docker logs liteweb3xx
View the logs for the container.
docker rm liteweb3xx
Delete the container. This is necessary before
creating a new container with the same name.
docker exec -it liteweb3xx bash
Open a shell in the running container.
Server installation (Windows)
To get started with LiteBox3D Webviewer server on Windows and
an evaluation license, see these simplified instructions:
Minimal installation on Windows
System requirements
To run LiteBox3D Webviewer server, you need the following
software:
Operating system: Microsoft Windows 11 or Windows Server
2019, or later versions
Microsoft Visual C++ Redistributable for Visual Studio
2022, available from Microsoft
(download).
Get the software
LiteBox3D Webviewer is available on request for purchase or
evaluation. Please
contact TECHNIA to get the
software.
Installation as a Windows service
LiteBox3D Webviewer server is not available as a native
Windows service. You can use a service wrapper to run the
LiteBox3D Webviewer server as a Windows service.
The instructions below show how to install the server as a
Windows service using the
NSSM service
wrapper. NSSM is third-party software under public domain;
it can be used for free without restrictions.
Unpack the downloaded zip file to a directory of your
choice.
Open a command window, and change to the directory
containing NSSM.exe.
Run the command:
nssm.exe install
This opens the NSSM service editor dialog.
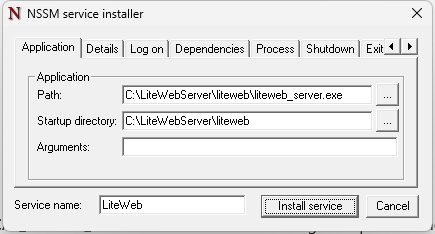
On the Application tab of the NSSM service editor,
define these settings:
Parameter
Description
Path
Path to liteweb_server.exe
Startup directory
Path containing liteweb_server.exe
Arguments
This field remains blank
Service name
Your preferred name of the service
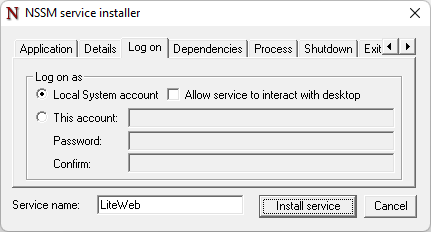
On the Log on tab of the NSSM service editor,
choose Log on as Local System account.
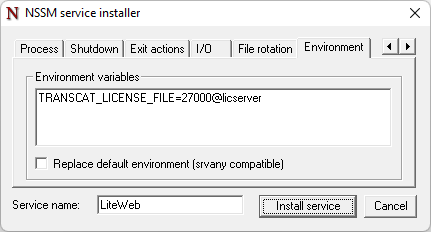
On the Environment tab:
If the license location is not defined elsewhere, you
can define it with the TRANSCAT_LICENSE_FILE variable
here. The following example is for hostname
licserver and port 27000:
TRANSCAT_LICENSE_FILE=27000@licserver
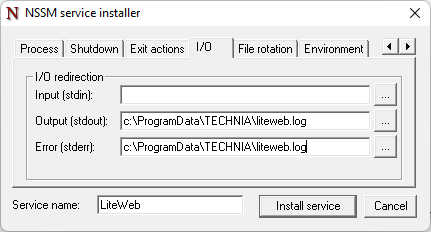
Optionally, the server console output can be written to
log files. To write log files, go to the I/O tab,
where you can define the paths and names for
Output (stdout) and Error (stderr).
Click Install service to install the service with
the current settings.
Start the service by one of the following methods:
In a command window with administrator permissions,
run this command:
net start servicename
Where servicename is the name of the service.
Type Windows+R and run this
command:
services.msc
In the Services window, right-click the entry
for the LiteBox3D Webviewer server and choose
Start.
Further steps:
Server configuration.
Changes to the configuration become active after
restarting the server.
Remove the service
To remove the LiteBox3D Webviewer service:
Open a command window, and change to the directory
containing NSSM.exe.
Run the command:
nssm.exe remove servicename
Where servicename is the name of the service.
If the service has been removed successfully, NSSM
displays a confirmation dialog.
Server installation (Docker)
To get started with LiteBox3D Webviewer server on Docker and
an evaluation license, see these simplified instructions:
Minimal installation on Docker
Get the software
LiteBox3D Webviewer is available on request for purchase or
evaluation. Please
contact TECHNIA to get the
software.
Load the image
At the command prompt, run this command to load the image:
docker load -i liteweb_3.x.x-xxxxxx.tar.gz
Where liteweb_3.x.x-xxxxxx.tar.gz is the image
file name.
Create a container (production use)
To create a new container from the image, use the
docker create
command.
Replace 3.x.x with the version string of the
image.
Replace liteweb3xx with the name you want to
assign to the new container. If you omit the
--name parameter, Docker assigns an arbitrary
name.
If the license is installed on FlexNet license server,
replace port@host with the actual license
location. Specify the port and hostname of the license
server. For example, if the hostname is
licserver and the TCP port is 27000, use this
argument: -e TRANSCAT_LICENSE_FILE=27000@licserver
When using an evaluation license, place the
license file in a directory on the host computer and
make the directory accessible to the containerized
Webviewer server. For example, if the license file is
located in /app/server/license/ on the
Docker host, use these arguments: -e TRANSCAT_LICENSE_FILE=/app/server/license/ -v
"c:\liteweb\license":"/app/server/license"
Example for a nodelock license file located at
c:\licenses\liteweb.lic:
TRANSCAT_LICENSE_FILE=c:\licenses
3.x.x is the version string of the image.
liteweb3xx is a name you want to assign to
the new container.
Consider using these additional options with the command:
Define the webserver TCP port used inside the container
and bind it to a port on the host computer:
-e PORT=9050 -p 80:9050
Replace
9050 in both
arguments with the TCP port in the container and
80 with the
port on the host computer.
Make a directory on the host accessible to the
containerized Webviewer server:
-v "c:\path\to\model":"/app/model"
Replace
c:\path\to\model
with the actual directory on the host and
/app/model
with the target mount point.
To read models from this directory, add the target mount
point to the ALLOWED_DIRS or
MODEL_DIRS variable, for example:
-e MODEL_DIRS="/app/model"
You can define additional environment variables by
adding further
-e name=value
parameters.
Start the container
At the command prompt, run this command:
docker start liteweb3xx
Where liteweb3xx is the container name.
Stop the service
At the command prompt, run this command:
docker stop liteweb3xx
Where liteweb3xx is the container name.
Start the service
If the service has been run before, you can start it again
using this command:
docker start liteweb3xx
Where liteweb3xx is the container name.
Remove the Docker image
If you don't need the container any more, you can remove it
using this command:
docker rm liteweb3xx
Where liteweb3xx is the container name.
Server configuration
Configuration using environment variables
The server can be configured using environment variables.
Environment variables are defined in in the
/liteweb/.env file or as system variables.
Define environment variables in the form name=value,
one variable per line.
When running the server in a Docker container, environment
variables can be passed to the server as command line
arguments.
Example (Windows):
        BIN=../win_b64/code/bin
        MODEL_DIRS=../model
HTTPS secure server connection
To serve the LiteBox3D Webviewer application over HTTPS, you
need an SSL certificate and private key. The server
automatically uses a secure connection (HTTPS, WSS) if the
certificate and key are found in the defined location.
The
KEY_FILE variable
defines the location of the SSL private key file.
The
CERT_FILE variable
defines the location of the SSL certificate file.
On the Windows platform, you can define variables
either as system variables or in the
.env file.
Example:
On the Docker platform, you can define the variables
and mount the directory containing the key and certificate
files when you create the container.
Install OpenSSL 1.1.1 libraries using a package manager,
or build the libraries from source. OpenSSL 1.0.x and
3.x cannot be used with LiteBox3D Webviewer.
Source code for OpenSSL release 1.1.1w is available on
GitHub.
Get SSL certificates.
Set the
KEY_FILE and
CERT_FILE
environment variables to the location of the SSL
certificates. If these locations are defined, the server
uses secure connections (HTTPS, WSS).
Models can be loaded from the local file system of the
server, and over FTP, HTTP, or HTTPS. To load models over
FTP or HTTP, no further configuration is required.
Enable loading models over HTTPS (Docker)
On the Docker platform, no further configuration is required
for loading models over HTTPS.
Enable loading models over HTTPS (Windows)
On the Windows platform, you need to install OpenSSL
libraries.
Build OpenSSL 1.1.1 libraries from source, or obtain
them in binary form from a trustworthy source.
Source code for OpenSSL release 1.1.1w is available on
GitHub.
OpenSSL 1.0.x and 3.x cannot be used with LiteBox3D
Webviewer.
Place the OpenSSL library files
libssl-1_1-x64.dll and
libcrypto-1_1-x64.dll in the
bin directory of the server installation.
Restart the server.
IMPORTANT
OpenSSL libraries are cryptography software. In some
regions of the world, the use, import, or export of
cryptography software may be restricted. You must observe
the applicable laws, rules and regulations for using
cryptography software.
Write console messages to a log file (Windows)
When running the server directly from a terminal, stdout and
stderr messages can be redirected to a log file. To do this,
append the highlighted arguments to the server start
command:
cd liteweb && liteweb_server.exe > c:\tmp\server.log 2>>&1
Replace c:\tmp\server.log with the full path of
the log file.
Request model data with authentication headers
If HTTP/HTTTPS requests for model data require authentication,
you can define HTTP headers which the webviewer server will
include in the request:
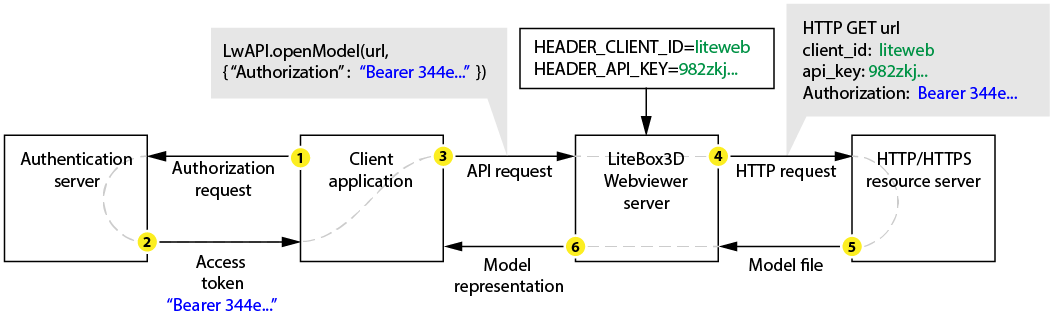
Static HTTP headers, which the webviewer server adds to all
requests for model data over HTTP/HTTPS, can be defined
using environment variables with the
HEADER_ prefix.
Dynamic HTTP headers can be passed as optional arguments
with the openModel and
addModel API commands.
Abstract flow of a model data request with authentication:
Known limitation: Only monolithic model files can be requested
with custom HTTP headers. If a model contains external
references (fully shattered JT, PLMXML, STEP AP242 BO Model
XML), no custom headers are sent when requesting the
referenced files.
Example
Static headers defined as environment variables:
    HEADER_CLIENT_ID=liteweb
    HEADER_API_KEY=54321
Dynamic headers in the openModel or addModel API command:
      // Get token from authentication server
      const getToken = async () => {
        const url = 'http://server:2345/oauth/token';

        const body = new URLSearchParams({
          grant_type: 'password',
          client_id: 'client',
          client_secret: 'secret',
          username: 'user',
          password: 'pass',
        });

        try {
          const response = await fetch(url, {
            method: 'POST',
            headers: {
              'Content-Type': 'application/x-www-form-urlencoded',
            },
            body: body.toString(),
            mode: 'cors',
          });

          if (!response.ok) {
            throw new Error(`Error: ${response.status} ${response.statusText}`)
          }
          const data = await response.json();
          return data.accessToken;
        } catch (error) {
          console.error('Error fetching token:', error);
          return null;
        }
      }

      // Request and open the model
      var myframe = document.querySelector('#myIframe');
      var win = myFrame.contentWindow || myFrame;
      var LwAPI = new LwApiPM(win);

      if (LwAPI) {
        myframe.onload = async function() {
          const TOKEN = await getToken();
          if (TOKEN) {
            const reqConfig = { headers: { Authorization: `Bearer: ${TOKEN}` } };
            LwAPI.openModel("http://resource:3003/file?id=aswdhbnf476jdhgf", reqConfig)
            .catch(function (error) {
              console.error('LwAPI Error:', error);
            });
          } else {
            console.error('Token could not be fetched');
          }
        }
      }
Cache
To reduce loading times of 3D models, LiteBox3D Webviewer
supports a server-side caching mechanism. When a model is
first loaded, the server processes and optimizes the 3D data,
then stores it in a cache. Subsequent requests for the same
model can be served directly from the cache, significantly
improving response times and reducing computational overhead.
The following sections describe how to configure and optimize
the caching mechanism for your deployment.
Cache: Database Connection
The cache system supports both PostgreSQL and SQLite databases
for persistent storage. Enable database caching by setting
USE_DATABASE=true.
SQLite Configuration
For SQLite, specify the database file path using
DATABASE_URL:
USE_DATABASE=true
DATABASE_URL=cache.db
This creates a local SQLite database file. Use a relative
path for the current directory or an absolute path for a
specific location.
PostgreSQL Configuration
For PostgreSQL, set USE_DATABASE=true and
provide connection details using standard PostgreSQL
environment variables:
Note: Use PGUSER (not
PGUSERNAME) for the database username.
Cache Eviction Strategies
When using database caching
(USE_DATABASE=true), two eviction strategies
help manage cache size:
Size-based eviction: Set
CACHE_MAX_MB to limit total cache size in
megabytes. When exceeded, least recently accessed entries
are automatically removed.
Age-based eviction: Set
CACHE_MAX_AGE_DAYS to automatically remove
entries older than the specified number of days.
Eviction is enforced by the built-in scheduler when
SCHEDULER_ENABLE_CRON_JOBS=true. Size eviction
runs daily at 4am, age eviction runs daily at 3am. Without
the scheduler, eviction settings are not enforced but can be
manually triggered with the Admin REST API (if enabled).
Cache: Secure Headers Configuration
The SECURE_HEADERS_INCLUDE and
SECURE_HEADERS_EXCLUDE
environment variables control which HTTP request headers are
considered "secure" (sensitive) and should be excluded from
cache validation keys.
Why This Matters
Cache keys are based on URL, processing options, and request
headers. Including sensitive headers like
Authorization in cache keys risks cache
poisoning, security leaks, and unnecessary cache
fragmentation. Marking headers as "secure"
excludes them from cache keys
while still forwarding them to upstream servers.
How It Works
Headers matching
SECURE_HEADERS_INCLUDE patterns are considered
secure, unless they also match
SECURE_HEADERS_EXCLUDE patterns. Secure headers
are filtered out of cache validation.
Both variables accept
comma-separated glob patterns:
authorization (exact),
*-token (matches bearer-token,
api-token), x-api-* (prefix
match). Patterns are case-insensitive.
Configuration Examples
Example 1: Basic Authentication Headers
Exclude all authorization-related headers from cache:
When both variables are empty or unset: All
headers are included in cache keys. This is
not recommended for production environments
with authenticated remote URLs.
Best Practices
✅ Recommended Setup
# Exclude common security headers from cache
SECURE_HEADERS_INCLUDE=authorization,cookie,x-auth-*,*-token,*-key,*-secret

# Keep content-affecting headers in cache key
SECURE_HEADERS_EXCLUDE=x-api-version,accept-*
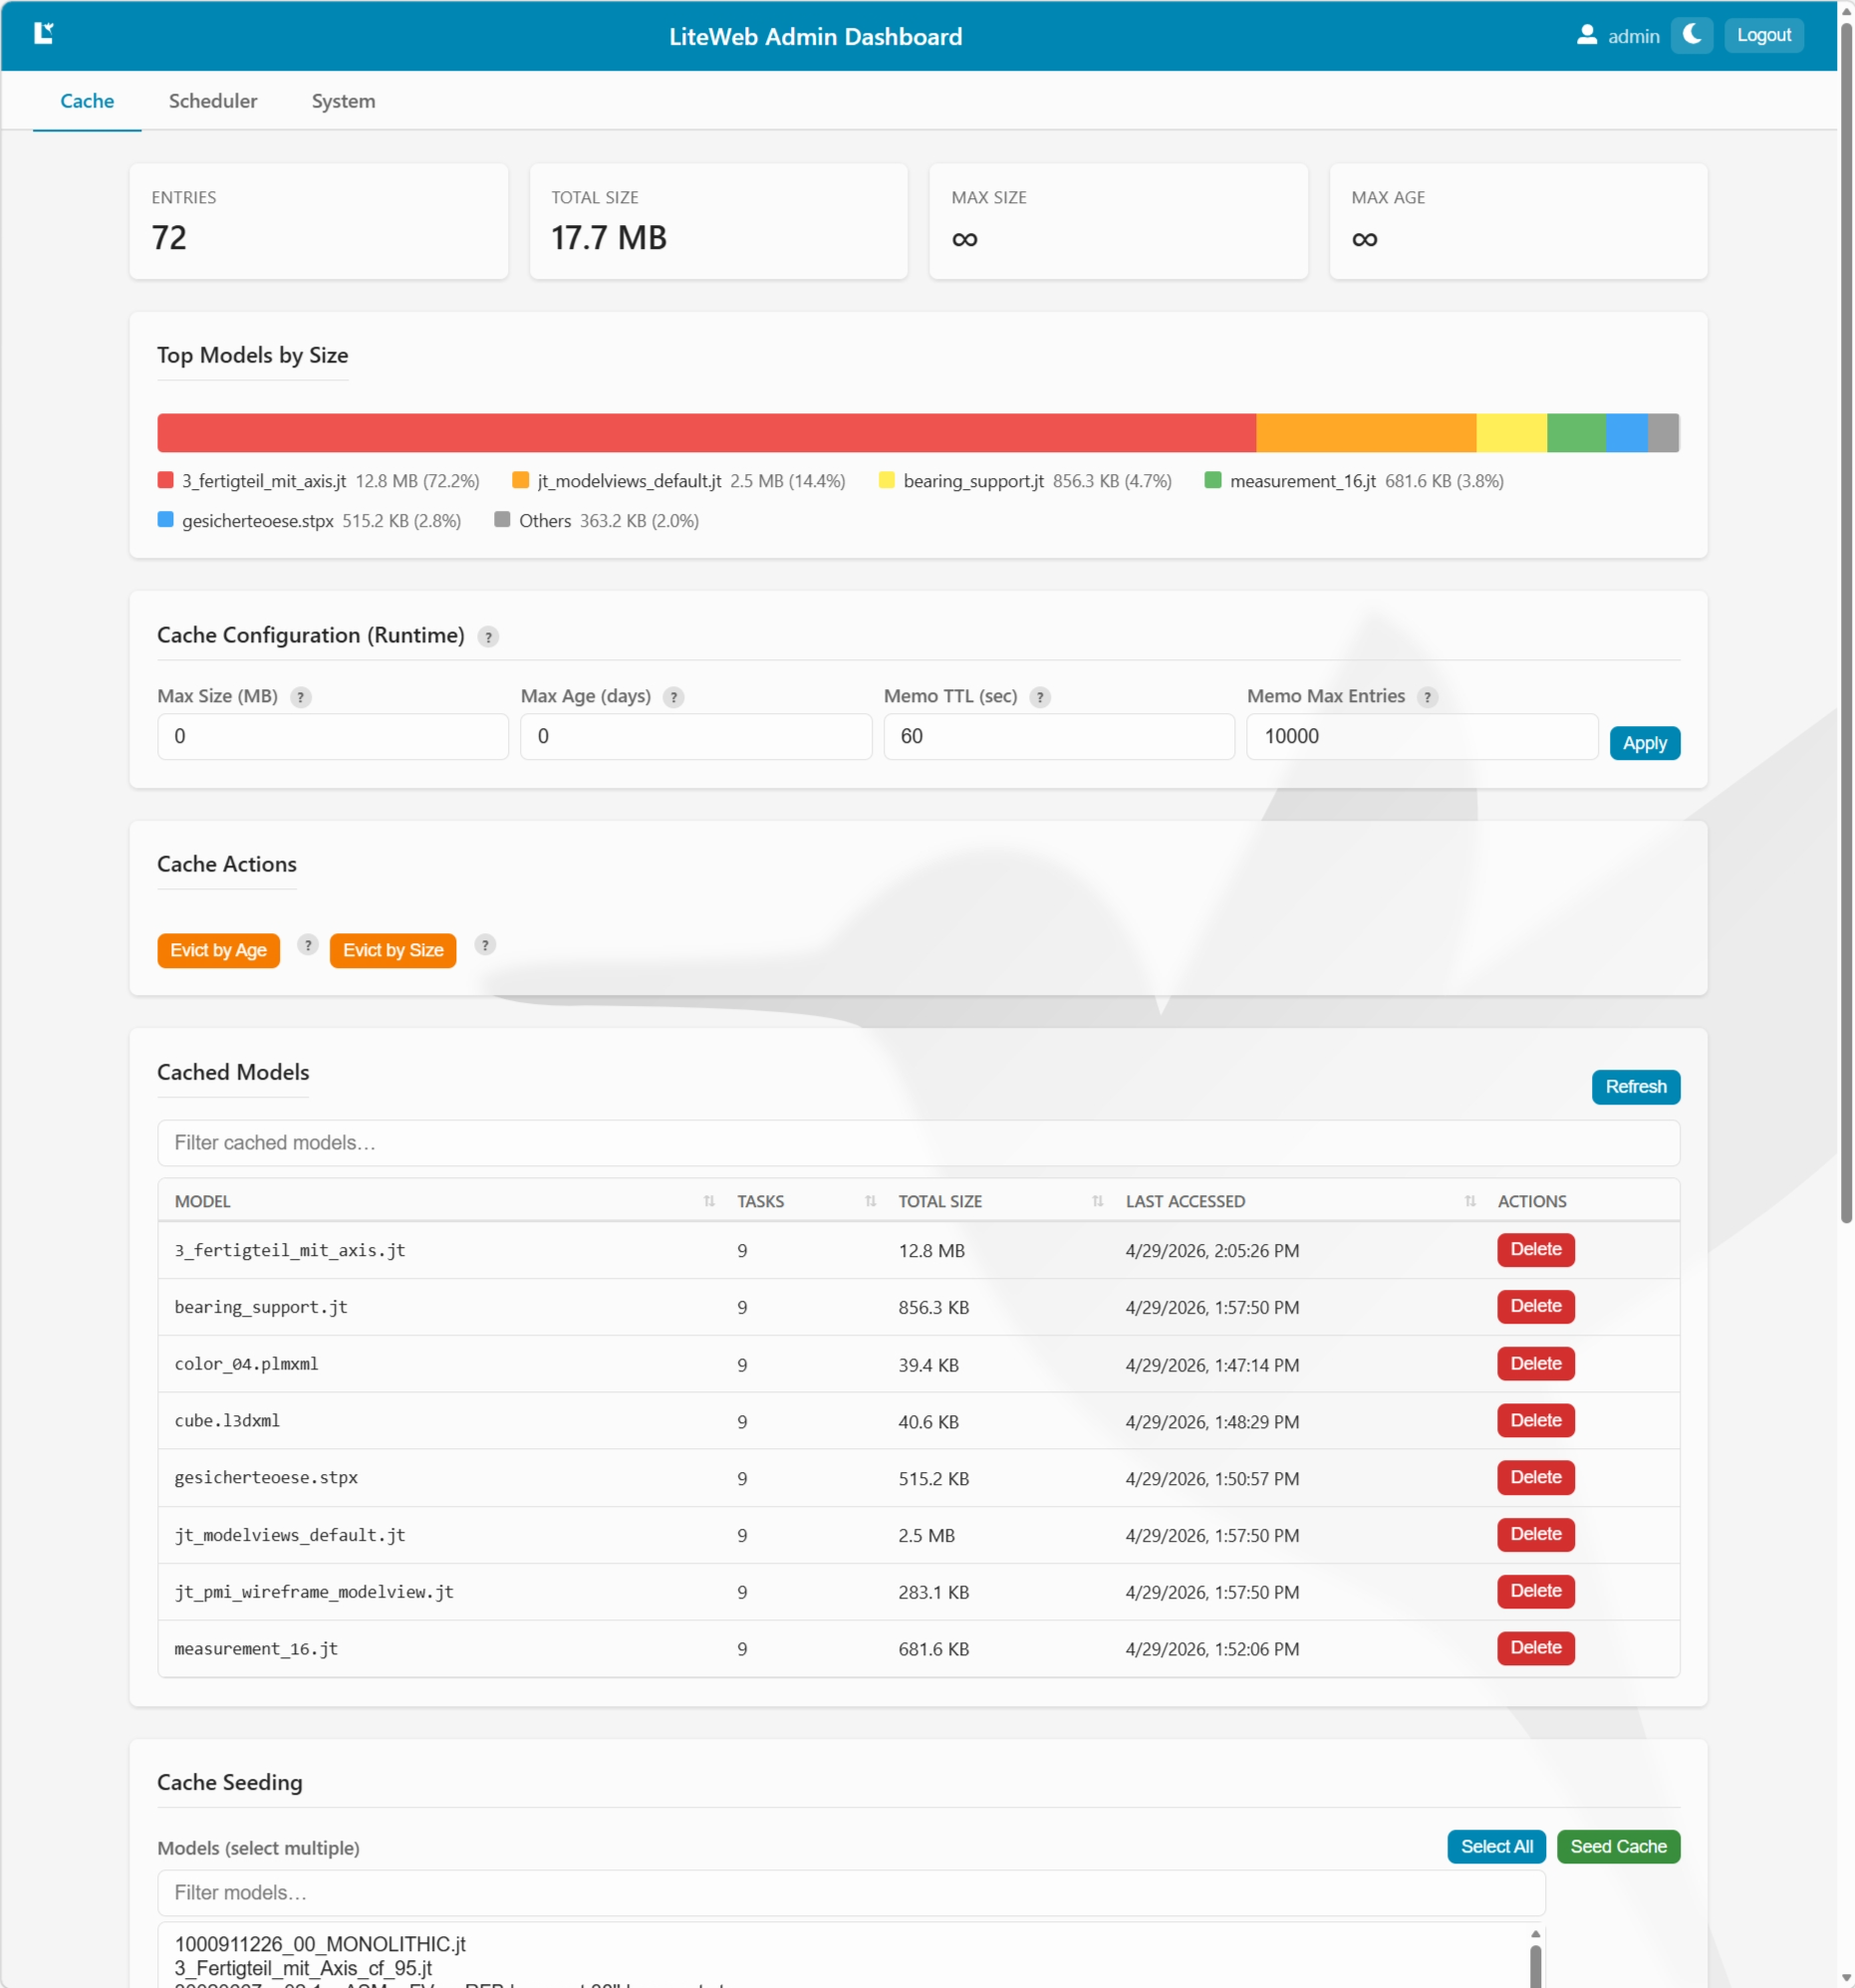
The server includes an optional admin dashboard accessible at
/admin when enabled via the
ADMIN_ENABLED environment variable. The dashboard
provides server monitoring, cache management, job scheduling
controls, and cache seeding capabilities.
To enable the admin UI, set
ADMIN_ENABLED=true and configure
ADMIN_PASSWORD (and optionally
ADMIN_USERNAME). See the environment variable
configuration section below for all admin-related settings.
The admin dashboard includes:
Cache tab - View cache entries, statistics,
and pre-seed models into cache
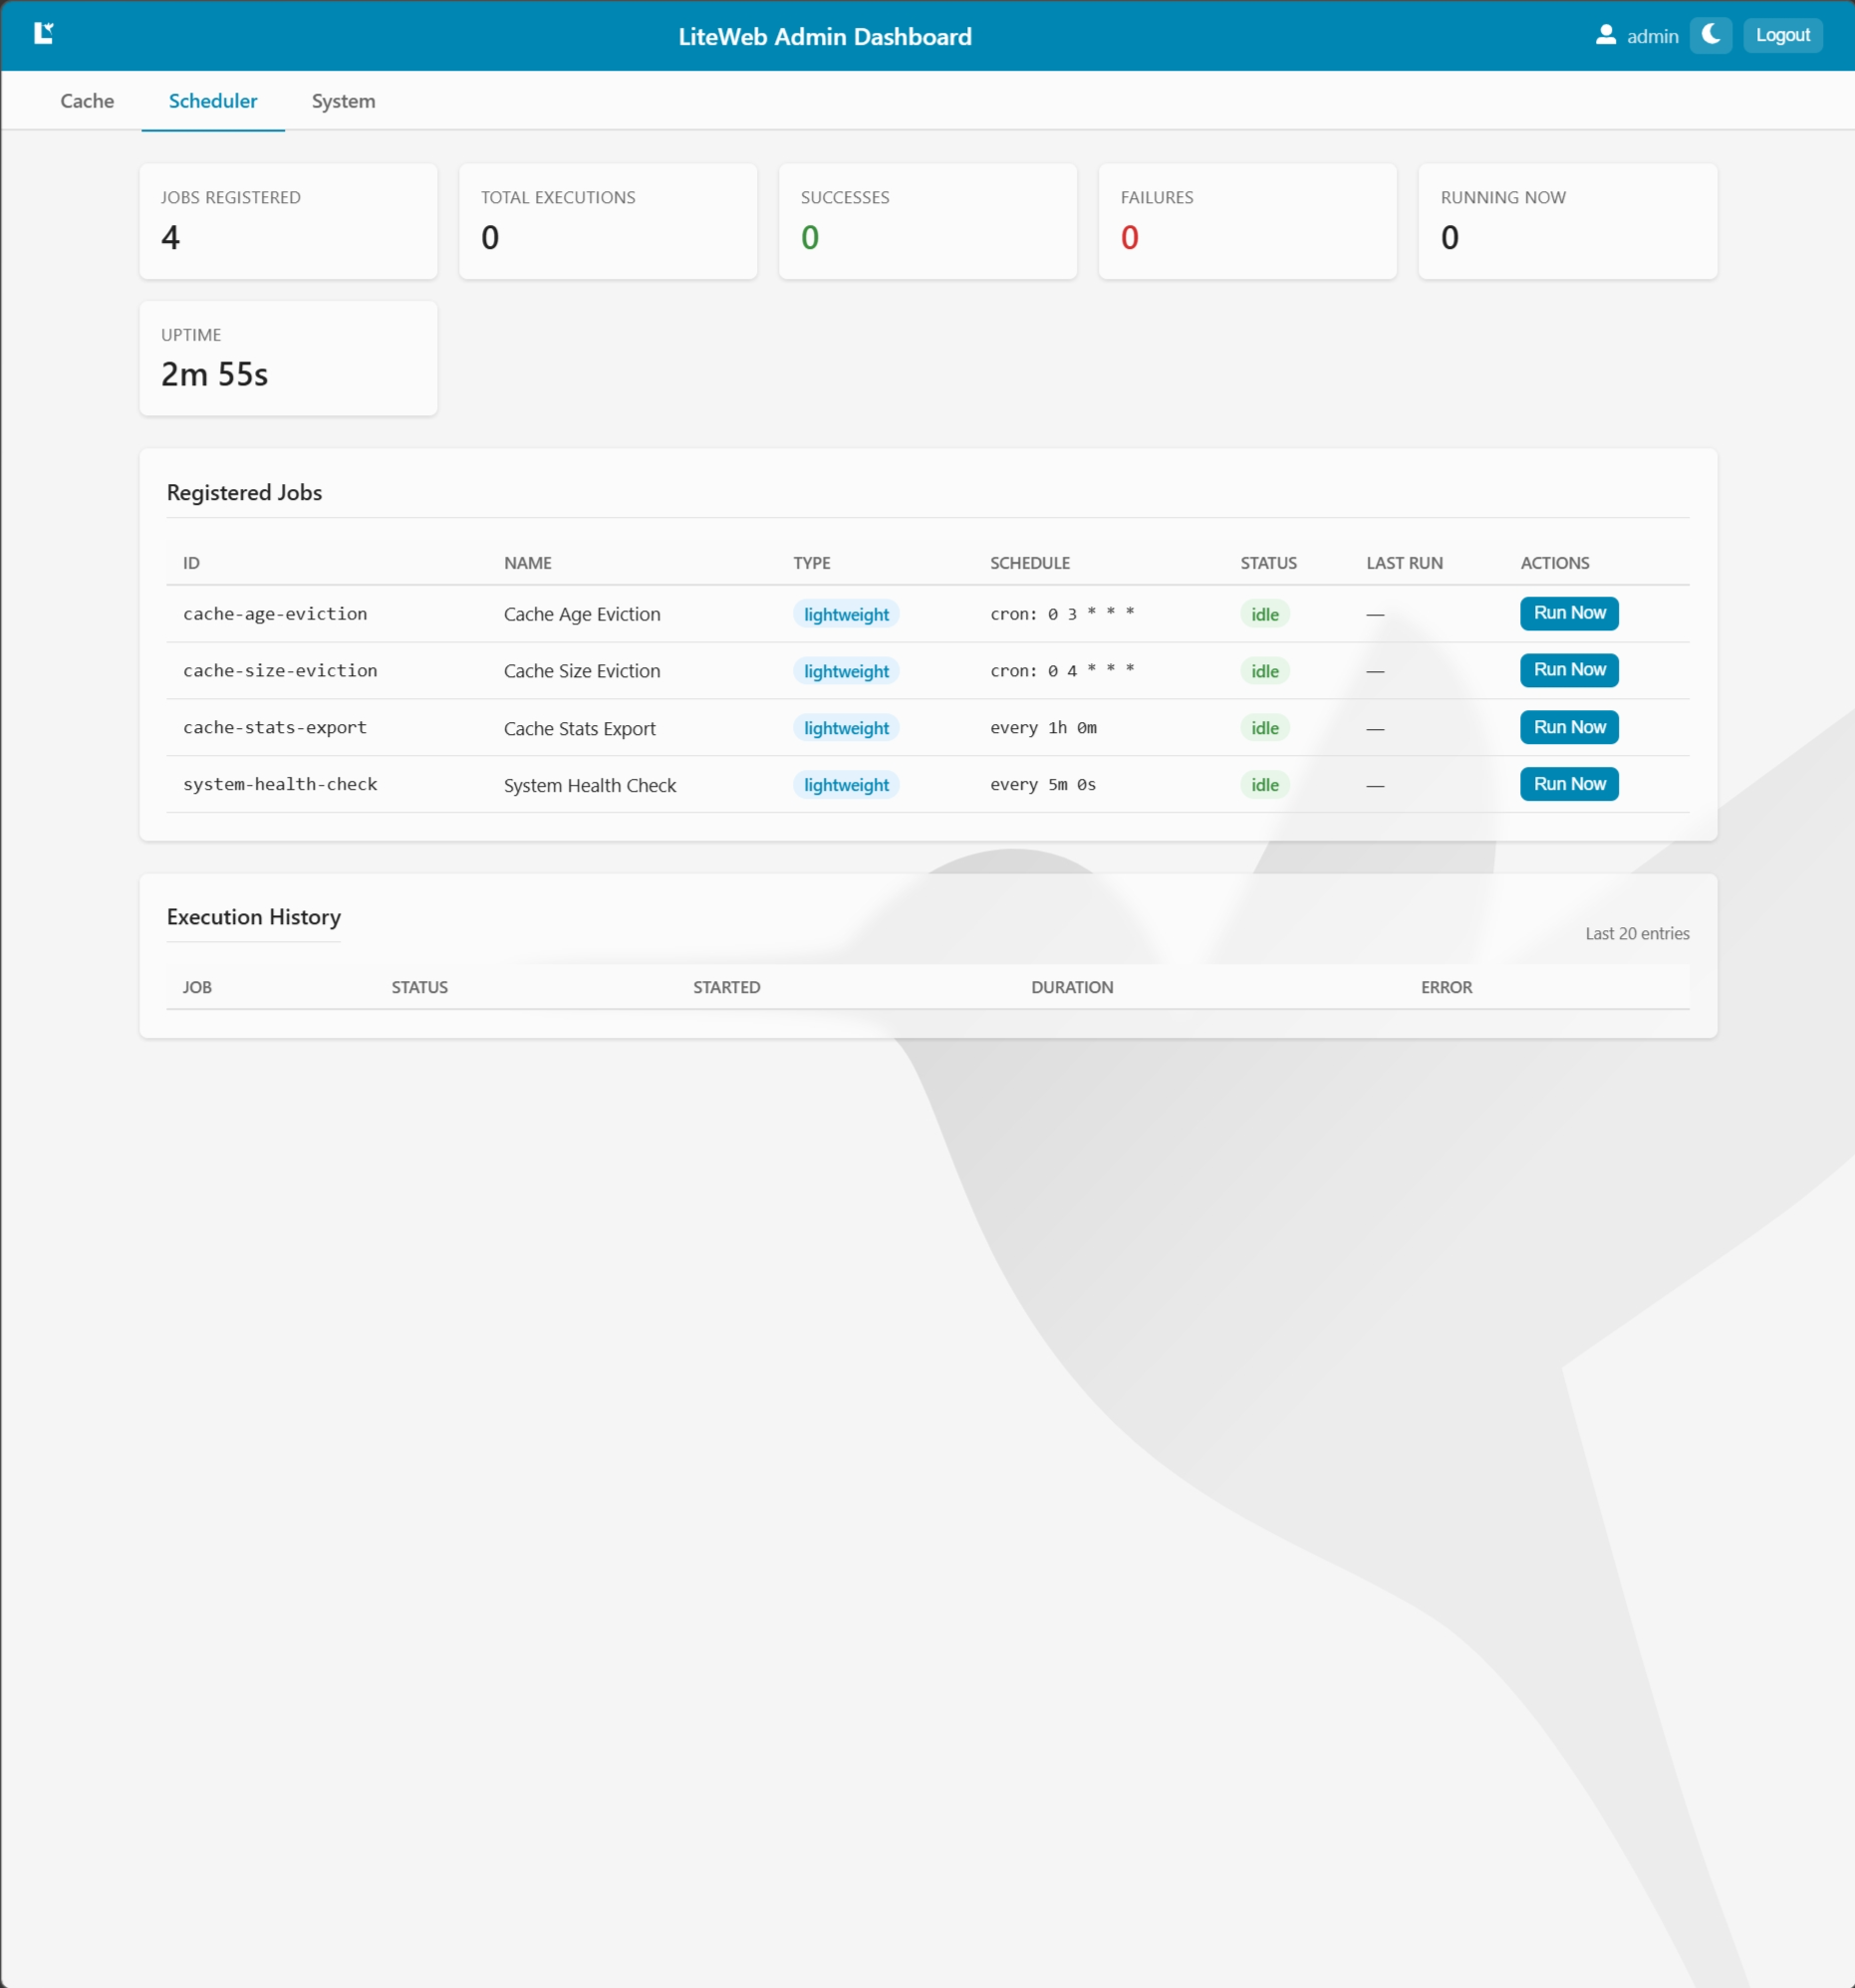
Scheduler tab - Configure and monitor
scheduled jobs for cache maintenance
System tab - Monitor server health and
performance metrics
[Admin UI Scheduler tab showing scheduler settings and
job history]
For programmatic access, see the
Admin REST API section.
Cache: Admin REST API
The Admin REST API provides programmatic access to manage the
LiteBox3D Webviewer server. All endpoints under
/api/admin/* are protected by JWT authentication,
except for the login endpoint.
Authentication
Most Admin API endpoints require JWT authentication. To
access protected endpoints:
Obtain a JWT token by calling
/api/admin/login
Include the token in the Authorization header
as Bearer <token>
Tokens expire after a configured time period (default: 3600
seconds). The server must have admin authentication enabled
and configured with valid credentials.
POST /api/admin/login
Authenticate and obtain a JWT token.
POST /api/admin/login
Content-Type: application/json

{
  "username": "admin",
  "password": "your-password"
}
Evict cached entries that exceed the configured maximum
age. There is no parameter for this endpoint - it uses the
maxAgeDays setting from the cache
configuration to determine which entries to evict.
POST /api/admin/cache/evict/age
Authorization: Bearer <token>
Evict cached entries to bring total cache size within the
configured limit. There is no parameter for this endpoint
- it uses the maxMB setting from the cache
configuration to determine how much data to evict.
POST /api/admin/cache/evict/size
Authorization: Bearer <token>
Get the current status and statistics of the job
scheduler.
GET /api/admin/scheduler/status
Authorization: Bearer <token>
Response
{
  totalJobsRegistered: number
  totalExecutions: number
  totalSuccesses: number
  totalFailures: number
  totalTimeouts: number
  totalSkipped: number
  currentlyRunning: string[] // job IDs
  lastExecution?: {
    jobId: string
    jobName: string
    startTime: Date
    endTime: Date
    duration: number // milliseconds
    status: ExecutionStatus
    error?: string
  }
  uptime: number // milliseconds
}
Allowed access methods for cross-origin HTTP requests
(CORS). Example value:
"GET, PUT, POST"
WORKER_PORT
Number
Port for communication between kernel and server.
Default value: 9051
LOG
String
Log level for the server process. Possible values:
trace, debug,
info, warn,
error, off
Defaults to info if not set. Controls
server-side verbosity independently of worker logging.
WORKER_LOG
String
Log level for the LiteWebWorker process. Possible
values: trace, debug,
info, warn,
error, off
If not set, the value of the LOG variable
is used. Values are normalized to the worker's
expected levels
(trace→debug,
debug→trace,
warn→warning,
none→off).
Use this setting to control worker verbosity when
troubleshooting, while keeping server-side logs
separate with the LOG variable.
TASK_TIMEOUT_SEC
Number
Maximum number of seconds a worker task may run before
the worker is restarted. Default value: 300 (5
minutes)
This timeout helps prevent hung worker processes from
consuming resources indefinitely.
ALLOWED_DIRS
List of strings
List of directories. Files with supported file types
from these directories and all subdirectories are made
available to clients but not listed in the file
chooser. You can use local paths, bind mounts (Docker)
and mapped network paths (Windows) accessible to the
Webviewer server process.
ALLOWED_DIRS=c:/models/public,x:/data
MODEL_DIRS
List of strings
List of directories. Files with supported file types
from these directories and all subdirectories are made
available to clients and listed in the file chooser.
You can use local paths, bind mounts (Docker) and
mapped network paths (Windows) accessible to the
Webviewer server process.
MODEL_DIRS=c:/models/public,x:/data
EXTENSIONS
String
List only files with the given extensions in the file
chooser.
EXTENSIONS=jt,plmxml
CLOSE_MODEL_TIMEOUT
Number
Number of minutes after the last request before the
file is closed on the server; the model remains
available in the browser client.
The default value is 2 minutes; the minimum value is 1
minute. A low timeout value helps reduce memory
consumption of the server process.
If models do not finish loading in the client within
the given period, you need to increase the timeout
value.
USE_ETAGS
Boolean
Set
USE_ETAGS=true
to enable caching of model data in the browser client.
This is the default setting. With caching enabled,
previously requested model data can be read from the
browser cache, which is faster than reading model data
from the server. The cache will be managed using ETags
(entity tags).
Set
USE_ETAGS=false
if model files read by the server might be overwritten
with new content under the same name.
USE_COMPRESSION
Boolean
Set
USE_COMPRESSION=true
to enable response compression. This is the default
setting. The server automatically selects the best
compression algorithm supported by the client
(priority order: zstd, br, deflate, gzip).
Files smaller than 1KB are not compressed. The
Vary: Accept-Encoding header is added
automatically.
Set
USE_COMPRESSION=false
to disable compression.
PUBLIC_DIR
String
Directory path for public assets. Default value:
./public
This setting provides flexibility for deployment
scenarios where the public assets directory differs
from the default location.
HEADER_name
String
Static HTTP header used when requesting model data
over HTTP/HTTPS.
You can define a static HTTP header by setting an
environment variable. The variable name is composed of
the prefix
HEADER_
(case-insensitive) and the header name. Underscores in
the name are converted to dashes. The value of the
variable is the value of the header. You can add any
number of HTTP headers, using one variable for each
static header.
Example: To send a header with the name
Cache-Control
and the value
no-cache, set
the variable
HEADER_CACHE_CONTROL=no-cache.
HTTP headers with dynamic names and values can be
defined as an optional arguments of the
openModel and
addModel
JavaScript API commands.
Known limitation: Only monolithic model files can be
requested with custom HTTP headers. If a model
contains external references (fully shattered JT,
PLMXML, STEP AP242 BO Model XML), no custom headers
are sent when requesting the referenced files.
Example for a license located on a FlexNet license
server with hostname licserver and TCP
port 27000:
TRANSCAT_LICENSE_FILE=27000@licserver
Example for a nodelock license file located at
c:\licenses\liteweb.lic:
TRANSCAT_LICENSE_FILE=c:\licenses
DOCUMENTATION
Boolean
Availability of documentation:
TRUE - Make
documentation available on the webviewer server
(default)
FALSE - Disable
documentation and hide the
Help menu item
USE_DATABASE
Boolean
Default: FALSE
Specify whether you want to use a database for the
cache. We are supporting Postgres and SQLite.
DATABASE_URL
String
If you want to use SQLite as a cache database, you can
specify the SQLite file here.
DATABASE_URL=cache.db
PGHOST PGPORT PGDATABASE PGUSER PGPASSWORD
various
If you want to use a postgres database for caching, set
the variable USE_DATABASE=true and provide
the connection details with these variables. Note that
only PGUSER and not
PGUSERNAME is working in our case.
CACHE_BLOB_STORAGE
String
The cache entries' 3d data can either be stored in the
database itself or in a separate file. In case you
have a lot of large 3d models stored in the cache, it
can improve lookup time and database size when the 3d
data is located in a separate file (blob) and only
referenced in the database record.
Possible values:
database
filesystem
CACHE_BLOBS_DIR
String
In case you selected filesystem above,
specify the location of the folder where the data blobs
should be stored here.
QUERY_VALIDATORS_CACHE_TTL_SEC
Number
Time-to-live (TTL) in seconds for the in-memory
validator query memoization cache. Default value: 60
This cache reduces redundant HTTP probes and
filesystem lookups for identical requests by
temporarily caching validator query results. Set to 0
to disable memoization.
QUERY_VALIDATORS_CACHE_MAX_ENTRIES
Number
Maximum number of entries in the validator query
memoization cache. Default value: 10000
When this limit is exceeded, the oldest entries are
evicted (FIFO). This setting works in conjunction with
QUERY_VALIDATORS_CACHE_TTL_SEC
to control memory usage of the in-memory cache.
CACHE_MAX_MB
Number
Maximum total size of the cache in megabytes. Default
value: 0 (unlimited)
When the cache exceeds this limit, the scheduler, when
enabled, automatically evicts the least recently
accessed entries. This setting only applies when
USE_DATABASE=true .
CACHE_MAX_AGE_DAYS
Number
Maximum age of cache entries in days. Default value: 0
(unlimited)
The scheduler, when enabled, automatically removes
cache entries older than this threshold. This helps
prevent stale data accumulation. This setting only
applies when
USE_DATABASE=true.
SECURE_HEADERS_INCLUDE
List of strings
Comma-separated list of glob patterns for HTTP headers
that should be masked (***) in server logs to protect
sensitive information.
Example:
authorization,*-token,api-key will mask
the Authorization header, any header ending in -token,
and the api-key header.
Use in combination with
SECURE_HEADERS_EXCLUDE for fine-grained
control.
SECURE_HEADERS_EXCLUDE
List of strings
Comma-separated list of glob patterns for HTTP headers
that should NOT be masked in logs, even if they match
SECURE_HEADERS_INCLUDE patterns.
This allows you to exclude specific headers from
masking. For example, if you include
*-token but want to log
csrf-token, add it to the exclude list.
SCHEDULER_ENABLE_CRON_JOBS
Boolean
Enable or disable built-in scheduled jobs for cache
maintenance. Default value: false
Built-in jobs include cache age eviction (daily at
3am), cache size eviction (daily at 4am), cache stats
export (hourly), and health checks. Set to
false to disable automatic cache
maintenance.
SCHEDULER_CHECK_INTERVAL_MS
Number
Interval in milliseconds between scheduler checks for
pending jobs. Default value: 5000 (5 seconds)
Valid range: 1000 to Infinity. Lower values provide
more responsive scheduling but increase CPU usage.
Higher values reduce overhead but may delay job
execution.
SCHEDULER_MAX_HISTORY_SIZE
Number
Maximum number of job execution records to retain in
memory for the admin dashboard. Default value: 100
Valid range: 10 to 1000. Older execution records are
discarded when this limit is reached.
SCHEDULER_ENABLE_IDLE_DETECTION
Boolean
Enable idle detection for scheduled jobs. Default
value: true
When enabled, jobs with idle-based schedules can
automatically run during server idle periods (when
request activity is low). This allows
resource-intensive tasks to run without impacting user
requests.
SCHEDULER_IDLE_REQUEST_THRESHOLD_SEC
Number
Number of seconds without incoming requests before the
server is considered idle. Default value: 30
Valid range: 1 to Infinity. This threshold determines
when idle-scheduled jobs can execute. Only applies
when
SCHEDULER_ENABLE_IDLE_DETECTION=true.
ADMIN_ENABLED
Boolean
Enable the admin dashboard at /admin.
Default value: false
The admin dashboard provides server monitoring, cache
management, job scheduling controls, and cache seeding
capabilities. When enabled, you must set
ADMIN_PASSWORD.
ADMIN_USERNAME
String
Username for admin dashboard login. Default value:
admin
Used with ADMIN_PASSWORD for
authentication to the admin dashboard.
ADMIN_PASSWORD
String
Password for admin dashboard login. Required when
ADMIN_ENABLED=true
The password is hashed using bcrypt at server startup
and is never logged or exposed. Use a strong password
to protect the admin interface.
ADMIN_JWT_SECRET
String
Secret key for signing JWT tokens used for admin
authentication. If not set, a random secret is
generated at startup.
Set this explicitly in production environments to
maintain valid sessions across server restarts. Use a
long, random string (e.g., 64-character hex string).
ADMIN_JWT_EXPIRY_SEC
Number
JWT token expiry time in seconds. Default value: 3600
(1 hour)
Valid range: 60 to 86400 (1 minute to 24 hours). After
this time, users must re-authenticate to access the
admin dashboard.
ADMIN_CACHE_SEED_MODELS
String
Comma-separated list of model file paths to
automatically pre-seed into the cache on server
startup.
Example:
c:/models/engine.jt,c:/models/chassis.jt
Pre-seeding warms the cache by loading commonly-used
models and their associated tasks (tree, properties,
PMI, textures, images, etc.) before user requests
arrive, improving initial load times.
User interface settings
Environment variable
Type
Description
UI_SHOWNAVBAR
Boolean
Show or hide the navigation bar.
UI_SHOWBOTTOMTOOLBAR
Boolean
Show or hide the bottom toolbar. The bottom toolbar
provides access to the tree, properties, and tools
panels.
UI_SHOWOPENBUTTON
Boolean
Show or hide the file chooser on the navigation bar.
UI_STARTPAGE
String
Choose which start page to show when you open or
reload the browser window:
default - Empty
viewer
tiled - Tiles with
preview images of models from
MODEL_DIRS
list - List of
models from
MODEL_DIRS
UI_TASKS_IMAGE
Boolean
Enable or disable preview images.
UI_EXPLORERTILEVISU
Boolean
Show tiles instead of the file list in the LiteBox3D
Explorer dialog. To show preview images on the tiles,
set also UI_TASKS_IMAGE=true.
UI_TREEEXPANDED
Boolean
Initially show or hide the tree panel. If the viewer is
less than 840 pixels wide, the tree panel will cover the
viewing area.
UI_TREE_STARTLEVEL
Number
Hide the topmost levels of the model tree. Set any
number of levels to hide:
0 = Show all tree levels (default)
1 = Hide the Scene node
2 = Hide the Scene and file nodes
3 = Hide the Scene, file, and root assembly nodes
etc.
UI_SHOWPROGRESSBAR
Boolean
Show or hide the progress bar.
UI_SHOWTOASTS
Boolean
Show or hide system messages.
UI_SHOWCOORDINATESYSTEM
Boolean
Show or hide the XYZ coordinate system in the viewing
area.
UI_DISABLESELECTION
Boolean
Disable selection of items (true or false). This
settings applies to interactive selection in the viewing
area and tree as well as selection by API commands.
UI_SHOWLOGO
Boolean
Show or hide the TECHNIA logo in the viewing area.
UI_USEGHOSTSELECTION
Boolean
Use ghosted display for the selection (display the
selected item in full color and other items
semi-transparent).
UI_BOTTOMTOOLBARENTRIES_TREE
Boolean
Show or hide the model tree.
UI_BOTTOMTOOLBARENTRIES_PROPERTIES
Boolean
Show or hide the Properties option on the bottom
toolbar.
UI_BOTTOMTOOLBARENTRIES_TOOLS
Boolean
Show or hide the Tools menu on the bottom
toolbar.
UI_NAVBARENTRIES_FITALLIN
Boolean
Show or hide the Fit all in button on the
navigation bar.
UI_NAVBARENTRIES_FITINITEM
Boolean
Show or hide the Fit in item button on the
navigation bar.
UI_NAVBARENTRIES_PMI
Boolean
Show or hide the Shoe/Hide PMI button on the
navigation bar.
UI_NAVBARENTRIES_HELP
Boolean
Show or hide the Help item on the menu.
UI_NAVBARENTRIES_ERRORHISTORY
Boolean
Show or hide the Error history item on the menu.
UI_NAVBARENTRIES_ABOUT
Boolean
Show or hide the About item on the menu.
UI_NAVBARENTRIES_SHADED
Boolean
Show or hide the visualization mode button
(Shaded/Shaded with wireframe) on the navigation bar.
UI_NAVBARENTRIES_MEASUREMENT
Boolean
Show or hide the Measurements button on the
navigation bar.
UI_TOOLSENTRIES_SCREENSHOT
Boolean
Show or hide Screenshot on the Tools menu.
UI_TOOLSENTRIES_MODELVIEWS
Boolean
Show or hide Model views on the
Tools menu.
UI_TOOLSENTRIES_CLIPPING
Boolean
Show or hide Clipping on the Tools menu.
UI_TOOLSENTRIES_EXPLOSION
Boolean
Show or hide Explosion on the Tools menu.
UI_TOOLSENTRIES_OPTIONS
Boolean
Show or hide Options on the Tools menu.
UI_TOOLSENTRIES_MEASUREMENT
Boolean
Show or hide Measurement on the
Tools menu.
UI_TOOLSENTRIES_LAYERFILTER
Boolean
Show or hide Layerfilter on the
Tools menu.
UI_OPTIONSENTRIES_ANIMATION
Boolean
Show or hide the animation settings in the
Tools > Options dialog.
UI_OPTIONSENTRIES_GHOSTSELECTION
Boolean
Show or hide Ghost selection in the
Tools > Options dialog.
UI_OPTIONSENTRIES_BOUNDINGBOX
Boolean
Show or hide Bounding box in the
Tools > Options dialog.
UI_OPTIONSENTRIES_PROJECTION
Boolean
Show or hide Orthographic projection in the
Tools > Options dialog.
UI_OPTIONCOLORS_CANVASCOLOR
Boolean
Show or hide Canvas color in the
Tools > Options dialog.
UI_OPTIONCOLORS_PMICOLOR
Boolean
Show or hide PMI color in the
Tools > Options dialog.
UI_OPTIONCOLORS_HIGHLIGHTCOLOR
Boolean
Show or hide Part highlighting color in the
Tools > Options dialog.
UI_CLIPPINGCAP
Boolean
Show or hide clipping caps
UI_CLIPPINGCAPCOLOR
List of 3 numbers 0...255
Clipping cap color. Specify the RGB color code as a
list of three numbers 0 to 255. The default color is
[197,185,172].
UI_WIREFRAMECLIPPING
Boolean
Hide (true) or show (false)
the wireframe of the cut away geometry.
UI_NONROOTMODELVIEWS
Boolean
This setting controls which model views are listed on
the Tools > Modelviews menu: false = model views
attached to the root element (default); true = model
views attached to the currently selected element
UI_LENGTHUNIT
String
Length unit for measurements. The following units are
supported: "mm", "cm", "m", "in", "ft", "yd"
UI_SCREENSHOTPREFIX
String
File prefix for screenshots. The default file prefix is
LiteBox3D_Screenshot_.
3D display settings
Environment variable
Type
Description
UI_SHOWPMI
Boolean
Initially show PMI elements. You can show or hide PMI
via Tools > Options > PMI.
UI_USEPMICOLORSFROMFILE
Boolean
true = Display PMI elements in their native color,
as defined in the model (default).
false = Display all PMI elements in the color
defined by pmiColor (see below). If pmiColor is not
set, PMI elements are displayed in black.
To avoid poor contrast, very light native PMI colors
with luminance above 90% are always replaced by
pmiColor or black if pmiColor is not set.
UI_PMICOLOR
List of 3 numbers 0...255
PMI elements color. PMI elements are displayed in the
defined color if usePmiColorsFromFile is true.
Example:
UI_PMICOLOR=255,0,0
UI_HIGHLIGHTCOLOR
List of 3 numbers 0...255
Color for highlighting the current selection. Specify
the RGB color code as a list of three numbers 0 to
255. The default color is light blue
[56,180,247].
UI_CANVASBACKGROUNDCOLOR
List of 3 numbers 0...255
Background color of the viewing area. Specify the RGB
color code as a list of three numbers 0 to 255. The
default color is white.
UI_MEASUREMENTCOLOR
List of 3 numbers 0...255
Color of measurements. Specify the RGB color code as a
list of three numbers 0 to 255. The default color is
dark green.
UI_ROTATION_ENABLE
Boolean
Enable or disable automatic rotation of the model.
UI_ROTATION_AXIS
List of 3 numbers
Axis for automatic rotation. Define the direction of
the axis as a directional vector [x,y,z]
Example: Automatic rotation around the Y-axis [0,1,0]:
UI_ROTATION_AXIS=0,1,0
UI_ROTATION_SPEED
Number
Speed of automatic rotation:
0 = Slow (default)
1 = Medium
2 = Fast
UI_DEFAULTVIEW
String
Initially display the model in the specified view
orientation: "ISO", "TOP", "BOTTOM", "LEFT", "RIGHT",
"FRONT", "BACK"
UI_SCENETRANSITIONTIME
Number
Transition time in seconds between redlining scenes or
model views, and for camera transitions and moving
parts during redlining scenes playback. Set a value
between 0 (no animation) and 5 seconds.
UI_DELAYBETWEENCAMANDPARTMOVEMENT
Number
For redlining scenes playback, this is the delay in
seconds between setting the camera view angle and
moving parts. Set a value between 0 (no delay) and 5
seconds. This delay is not applied if the location of
parts does not change between the previous and current
scene.
UI_DELAYBETWEENSCENES
Number
For redlining scenes playback, this is the delay in
seconds before entering the next scene. Set a value
between 0 (no delay) and 5 seconds.
UI_DEFAULTPROJECTIONORTHO
Boolean
Initially display the model in perspective or
orthographic projection:
true = Orthographic projection
false = Perspective projection
UI_SHADINGMODE
Number
Initially display the model in the specified
visualization mode:
0 = Shaded
1 = Shaded with wireframe
UI_DIRECTIONALLIGHTINTENSITY
Number (float)
Directional light intensity. The default value is
1.0.
UI_AMBIENTLIGHTINTENSITY
Number (float)
Ambient light intensity. The default value is
1.0.
UI_SHOWBOUNDINGBOX
Boolean
Initially show or hide the bounding box. You can show
or hide the bounding box via Tools > Options >
Bounding box.
true = Show bounding box
false = Hide bounding box
UI_LODLEVEL
Number
Choose the level of detail (LOD) to load. This applies
to JT files.
0 = Highest detail
1 = 2nd highest detail
2 = 3rd highest detail
etc.
UI_QUANTIZATIONBITS
Number
This setting controls compression and precision of 3D
data. Set a value between 2 and 30 (the number of
quantization bits).
2 = Maximum compression rate, lowest precision
14 = Generally sufficient precision for
visualization, if you do not intend taking
measurements
21 = Default setting
30 = Lowest compression rate, maximum possible
precision with quantization enabled
Replace JSON keys with environment variables
If you are upgrading LiteBox3D Webviewer from a previous
release where the configuration was stored in a JSON file,
you need to rewrite the configuration.
The table below shows JSON properties (as used in old
configuration files) and the corresponding environment
variables.

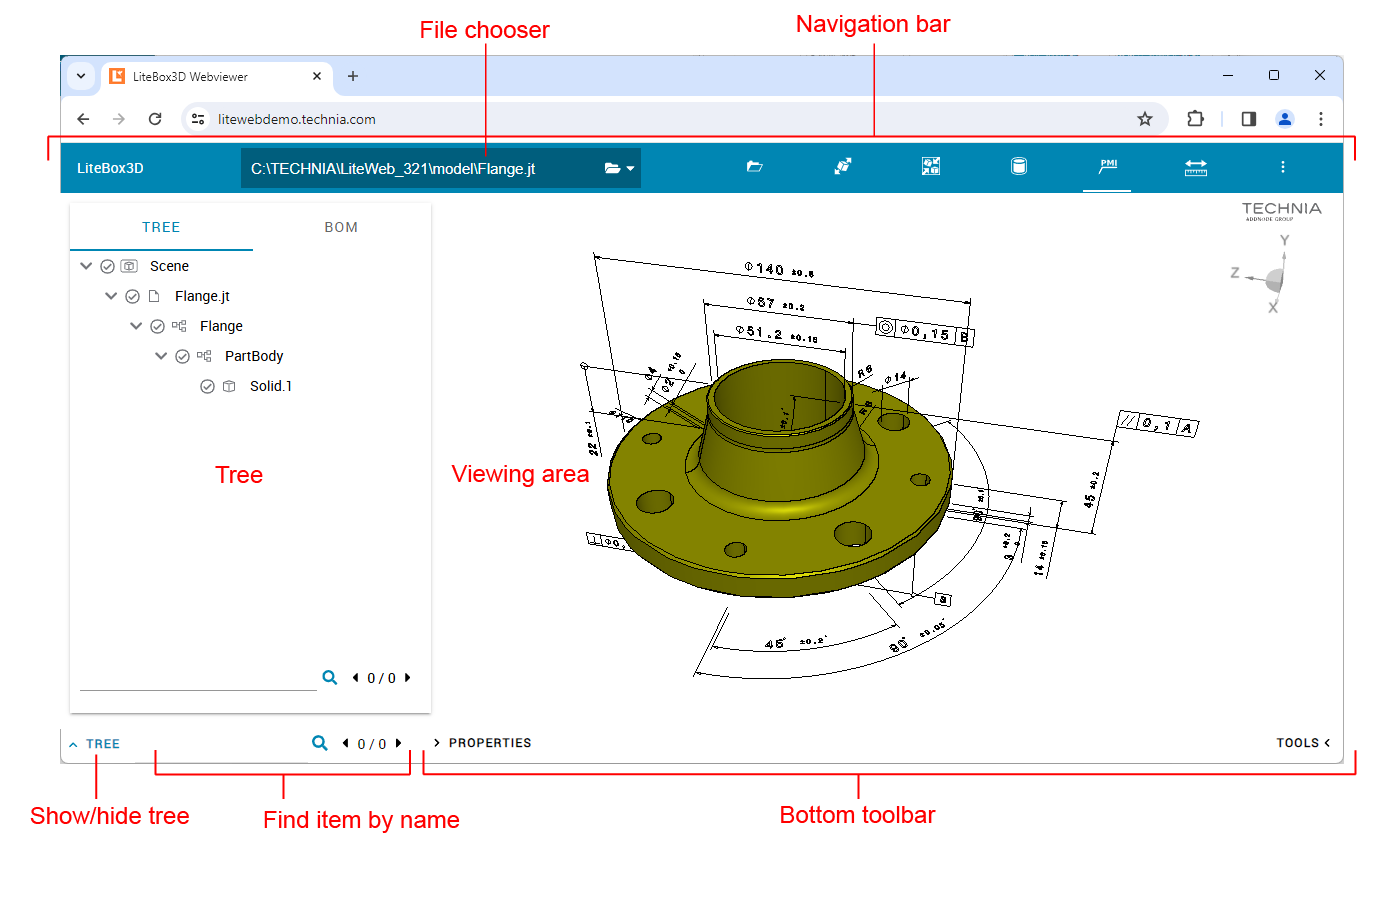
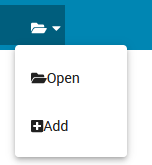
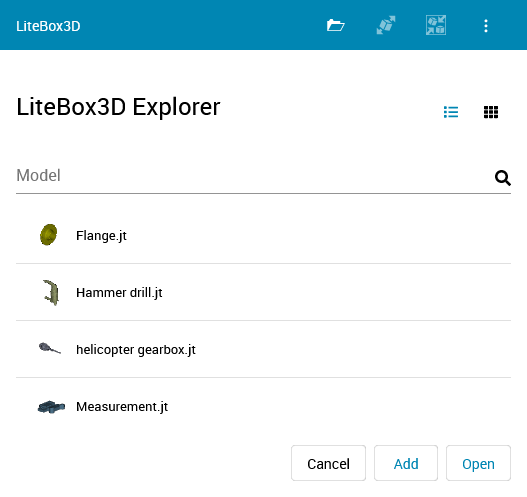
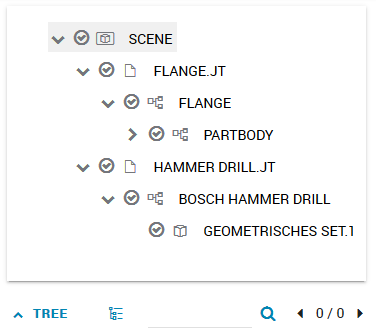
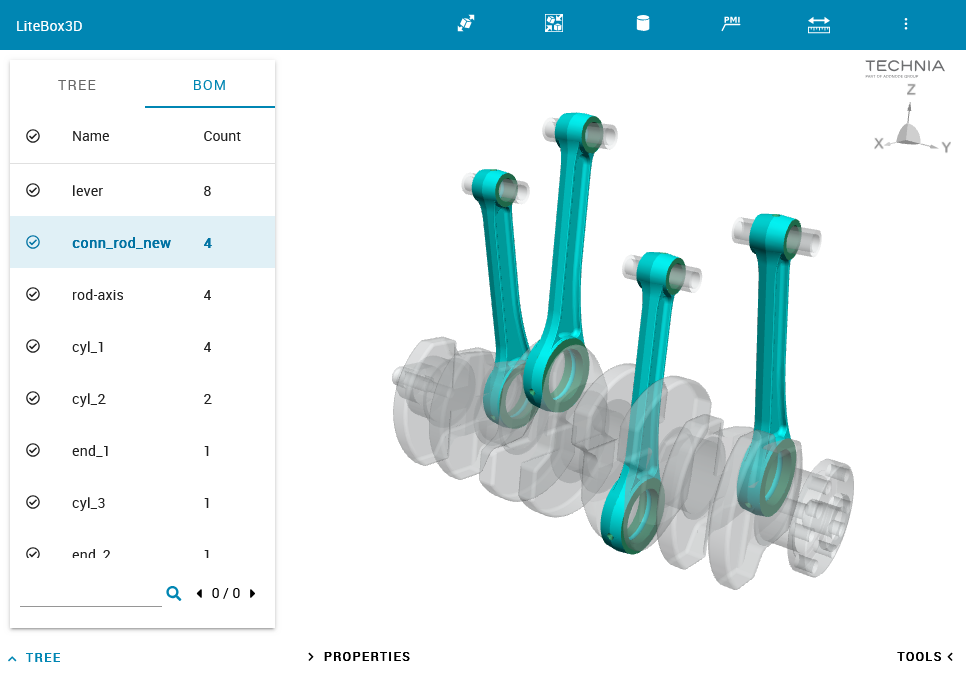
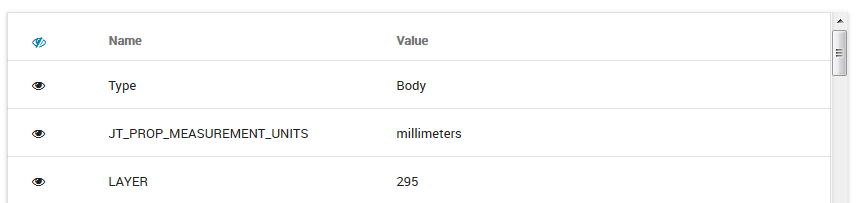
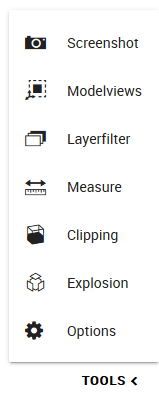
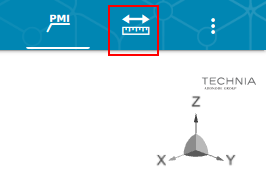
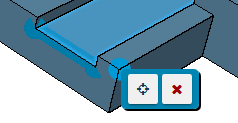
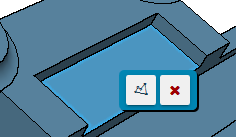
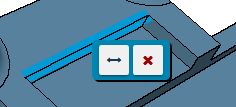
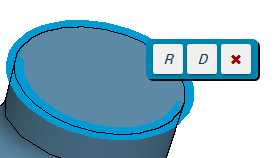

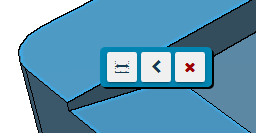
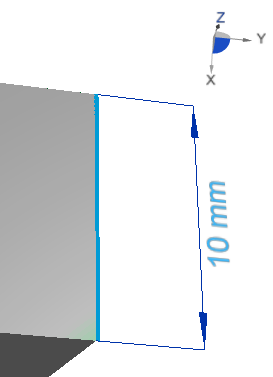
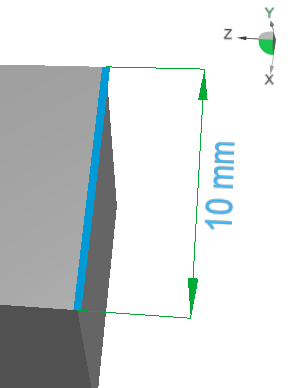
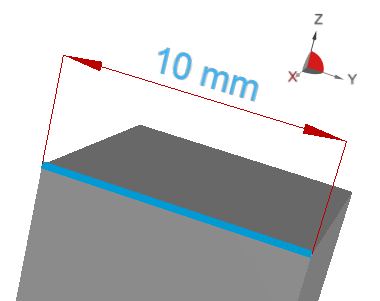
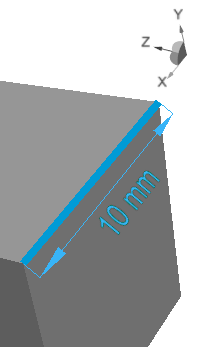
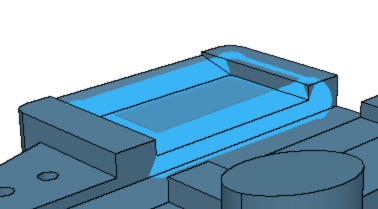

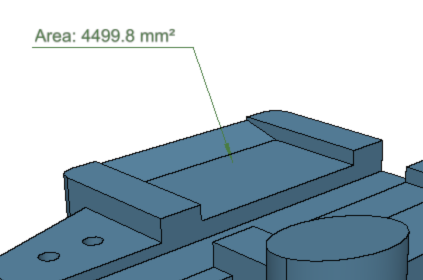
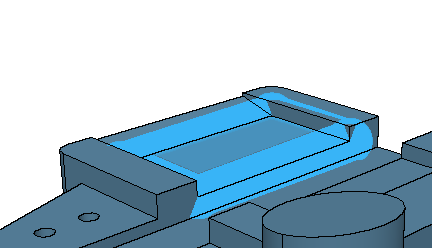
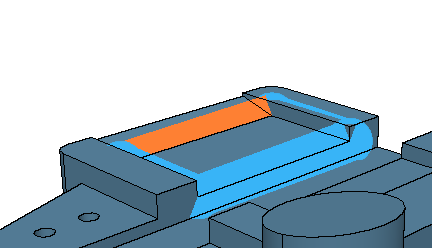
 or Position